Shepard Fairey, Mujer Fatal, 2007. Screenprint, 24 x 18 inches (61 x 45.7 cm). Acquired through the generosity of Beth and Anthony Terrana, Sandra and Gerald S. Fineberg, Fotene Demoulas, and the art…
View full credits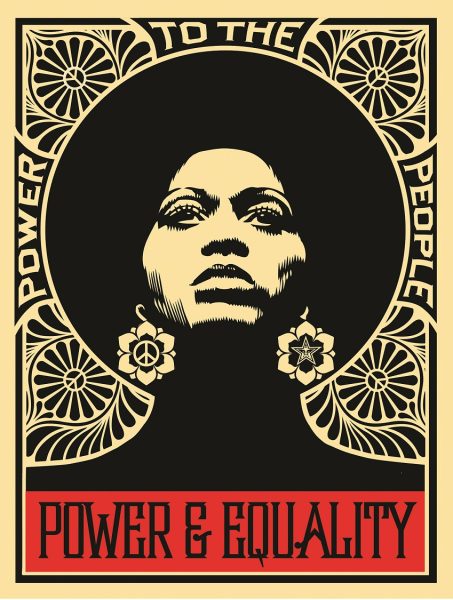
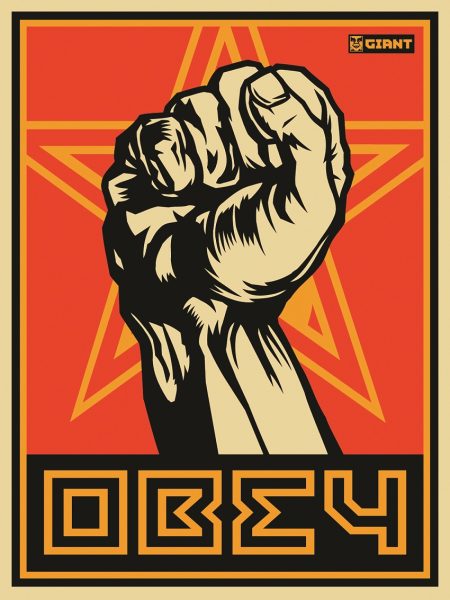
Shepard Fairey, Afrocentric (Power & Equality), 2007. Screenprint, 24 x 18 inches (61 x 45.7 cm). Acquired through the generosity of Beth and Anthony Terrana, Sandra and Gerald S. Fineberg, Fotene Demoulas, and the artist. Courtesy the artist and Obey Giant Art. © Shepard Fairey.
This activity is adaptable for beginners to experts, ideally ages 8 and up. Please note that this project involves using scissors to cut cardboard and/or paper. Great for individuals, groups, and families to work on together at home.
Inspired by Shepard Fairey’s artwork like Afrocetric (Power and Equality) (2007), create your own stencils with everyday materials found at home. Fairey sometimes uses stencils in his work, particularly in his street art. Once a stencil of an image is made, you can easily reproduce that image many times. By cutting, overlapping, and positioning stencils in new ways, we can create exciting artwork. Experiment with different shapes and patterns. Be creative and share what you make with the world!
You will need:

Optional:
Steps:
1. Draw or trace your shapes and designs on your cardboard. The bigger they are the easier they will be to cut. Think about shapes and designs and how they can be used to communicate ideas.
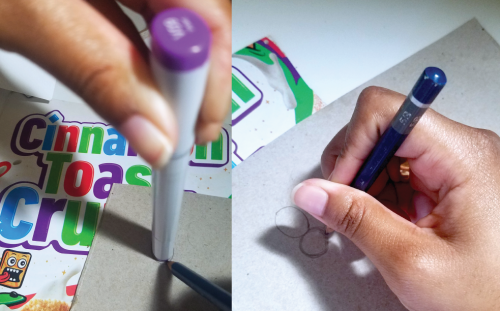
2. Carefully cut out your stencils. You can use both pieces as stencils. Try cutting your stencils in one cut. Move your cardboard as you cut along your shape until you are back where you made the first cut. You can place some tape along your initial cut to keep it intact as you trace.
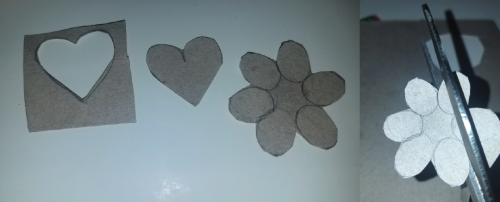
3. Trace your stencils on paper. You can tape down your stencils to keep them from moving while you trace. Try overlapping different shapes and designs.

4. Add color. Out-line and fill in the shapes and designs you traced.

Pro Tip!
You can save and reuse your stencils for future projects!
This activity was developed by Flolynda Jean, Studio Programs Education Assistant.
This activity invites kids and their grownups to unite over the meditative and ancient art of weaving. Reflect and create together while weaving your family narrative of life during quarantine.
This activity is appropriate for children ages 5 and up with the help of an adult.
You will need:
1. Writing Reflection Exercise:
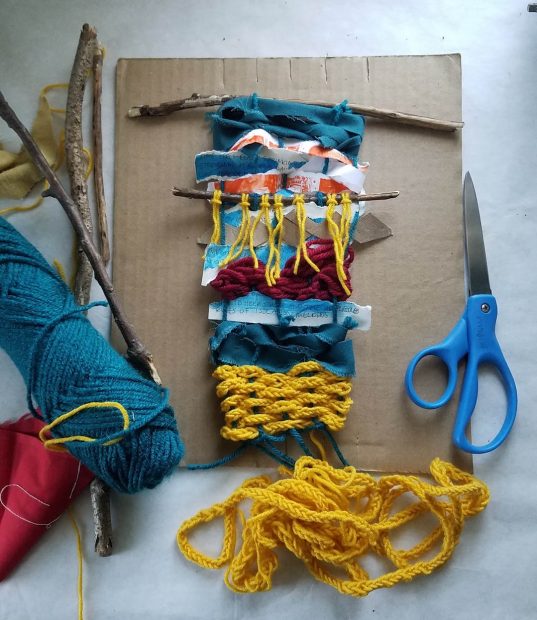
2. Make a loom:
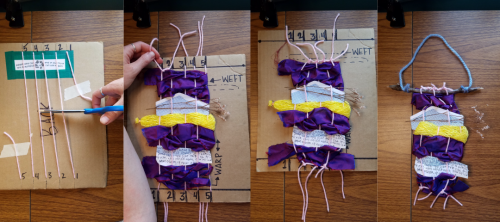
Mark 5 equidistant lines from the center of the top and bottom edges of your cardboard. Cut into each line to create equal-sized notches. Now you have a loom to create many weavings with!
3. String your loom:
Tape the end of a long piece of string to one side of the cardboard. Stretch and pull the string into the top, left notch. Stretch down the backside of the cardboard and pull into the bottom left notch. Repeat until the string is pulled snugly into each notch. Tape down end, leaving a 4” tail of string, then cut. Congrats, you’ve strung, or ‘warped’ your loom!

4. Weave!
Weave materials horizontally over and under the vertical strings. Alternate the over/under pattern on the next line. Try to maintain consistent tension while weaving, without pulling too hard. To incorporate your personal story into your weaving, written reflections could be cut or ripped into strips and woven in.
Learn the basics of weaving in these videos:
5. Remove Weaving from Loom:
On the back of the loom, cut the vertical strings across the center. Tie the end of the first string to the second, then second to third, and continue across the top. Repeat by tying your strings across the bottom. Trim ends. Tuck the ends of your weaving into the back. If you’d like, incorporate a stick or dowel and hanging string at the top.
Pro Tip!
You can use your loom to make many more weavings! Add more notches to create a wider weaving. To create different size weavings, change the size of your loom.
This activity was developed for children 3+ to create together with their caregivers and is easily adaptable for a variety of ages and interests.
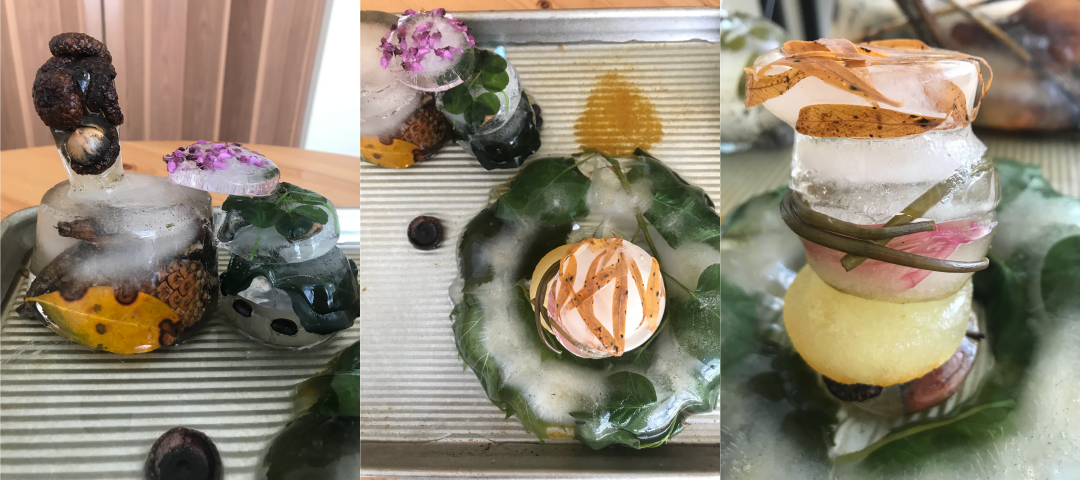
Artist Carolina Caycedo uses found objects to make artwork about rivers and the relationships that humans have with water. Caycedo thinks about the story of every objects and considers questions like, where does water come from? How do people use water now and throughout history? How are water and the environment cared for and how are they taken advantage of? Experiment with using water and found objects from around your own neighborhood to make your own frozen sculpture. As you create your frozen sculptures, look up where your tap water is sourced, find out what bodies of water you live near, and think about how you use water in and around your home everyday.
You will need:
Additional Optional Materials:
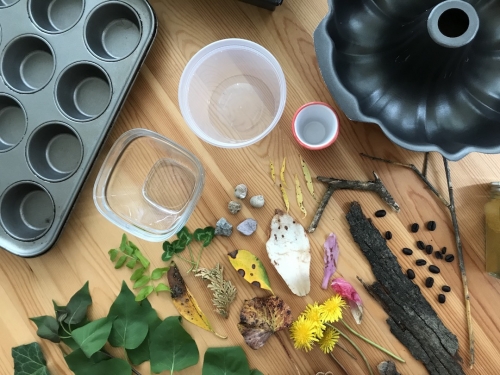
1. Go for a walk around your neighborhood and collect objects that you find from nature. Talk about why you chose them. Notice their textures and colors. Where did they come from? Why are they important?
2. Distribute your found objects among your containers. What stories do these arrangements tell about where you live?
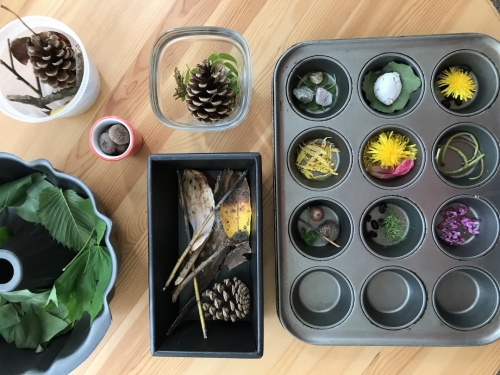
3. Fill your containers with water leaving space at the top for the water to expand as it freezes. Keep in mind that some objects will float to the top while others will sink to the bottom. If you have food coloring, add a drop to each container. Think about where you got your water. Would you consider it part of your community? Why or why not?
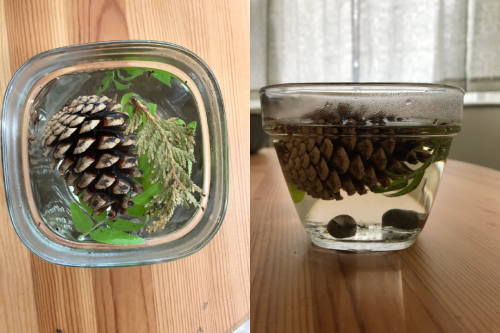
4. Place your containers in the freezer until the water freezes and becomes solid ice. What conditions are required to turn water into ice? How long did this take? Where can you find ice in nature?
5. Remove your frozen sculptures from their containers. Wiggle them free by running the container under warm water or wrapping it in a warm towel. Then flip it over and tap on the bottom. To contain the ice as it melts, consider placing your sculptures on a rimmed baking sheet, a large shallow bin, or directly on the ground outside.
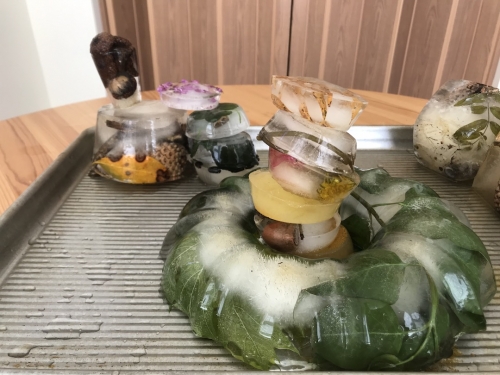
6. Build, play, create! Once emerged, notice how your found objects have changed.
This activity was created by Alice Matthews, Visitor Assistant.
This project is designed for kids and adults, ages 6 +
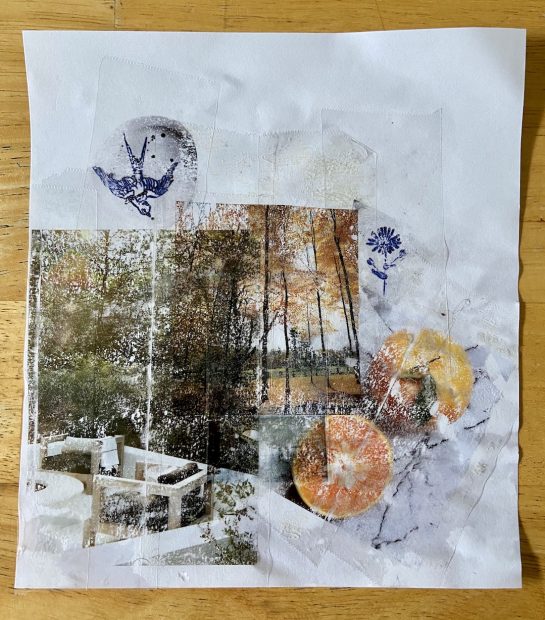
Explore your identity and create a collage that is as unique as you! Cut and collect images from magazines that represent your identity and use an image transfer technique to create a collage with see-through images.
This activity was facilitated as a virtual workshop during the June 2020 virtual Play Date: Creating for Care.
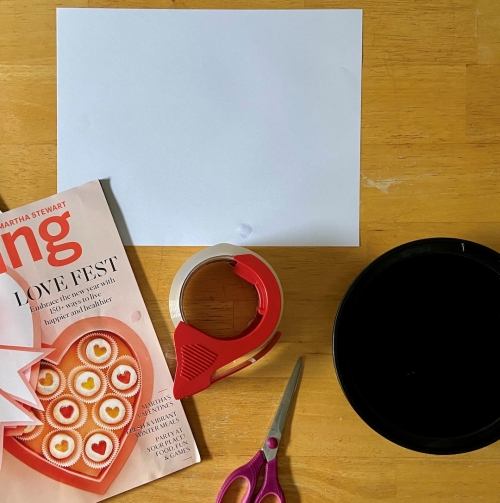
You will need:
Steps:
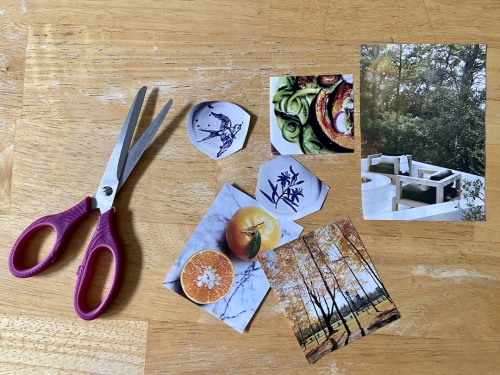
1. Cut and collect images from magazines that represent you. Think about your culture, heritage, family, friends, community, personality, hobbies – All the things that make up who you are. Find and cut out images from magazines that represent these things.
2. Cover your image side with packing tape. Make sure your tape is sticking to the side with the image.
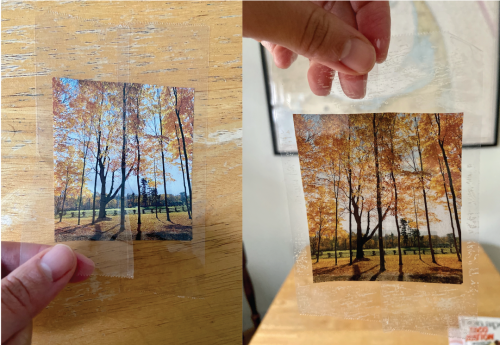
3. Once your image is covered, soak it in the bowl of water or spray the paper side with water. Repeat with all your images.
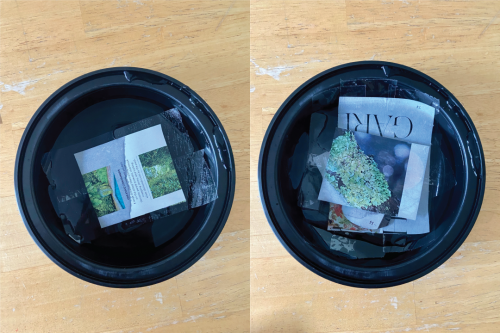
4. Peel/rub the paper off of your images. Play around with the soak times. The longer you leave your images in the water, the easier it will be to peel the paper off. Soaking for a shorter period of time will leave more of the paper on your image.
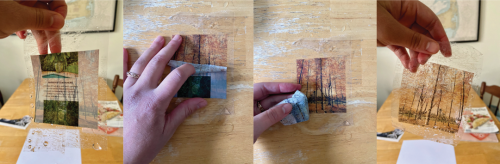
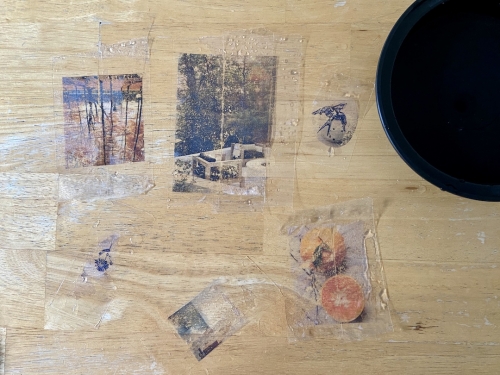
5. Once you have all your image transfers and they’ve dried, use them to create a collage. The transparency of the images let you play around with layering. You can collage just with your image transfers, on top of another piece of paper, or even on your window. You can also pair them with photographs, other magazine images, or drawings.
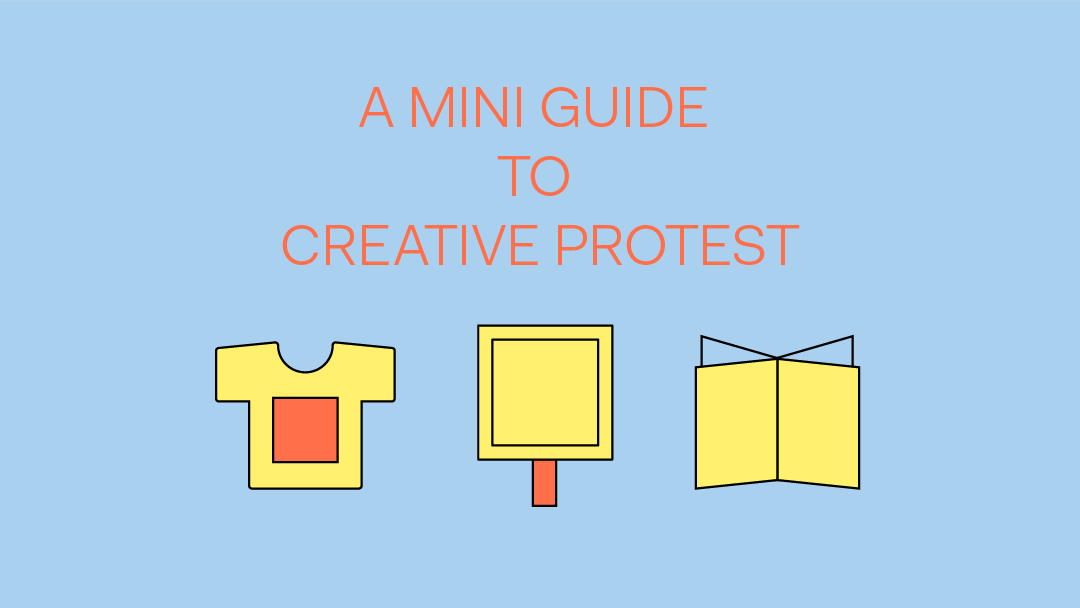
Join us as we use our creative powers to fight for racial justice! Below we’ve collected a few ideas inspired by contemporary artists and activists on how you can use art to spread messages of resistance, unity, and hope.
Step 1:
Choose your message. How will you support and affirm that Black Lives Matter? How can you support racial justice in your community? How will you stand for love, compassion, and equity? Craft a message that will inspire and move others to action.
Step 2:
Decide how you will express it.
 Chalk it.
Boston-based social justice organization Wee the People recently partnered with MassArt’s Center for Art and Community Partnerships and the Philly Children’s Movement to host Wee Chalk the Walk: A Family Day of Action for Black Lives. They invited kids and grownups to use chalk and create bold, beautiful messages on sidewalks to share with all who would walk by. Head outside and chalk your message. What do you want to say to help make the world a better place for all?
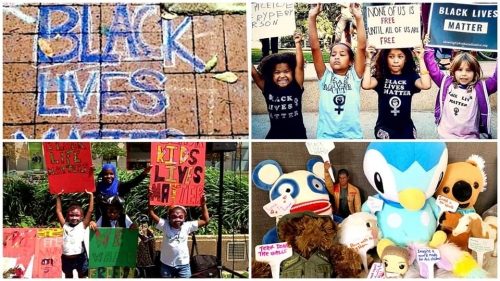 From Wee The People’s Wee Chalk the Walk: A Family Day of Action for Black Lives event on May 31, 2020. |
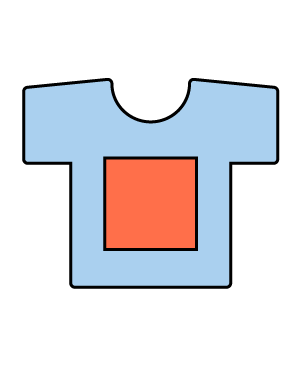 Wear it.
Nick Cave’s Soundsuit (2009) is a sculptural garment meant to be worn and activated with sound and movement. Responding to the ways Black people are often judged by the color of their skin, Cave created Soundsuits to act like protective armour. Incredibly detailed and decorated, they show us how wearing your art can be a powerful action. Wear your message for all to see. Recycle old fabrics and clothes to create a patch. Draw or write your message with fabric markers. Create a stencil to help apply your message. *Kids! Be sure to get permission from an adult before using any clothes for art making!*
|
 Zine it.
We recently highlighted a zine making activity inspired by Ellen Gallagher’s Deluxe (2004-05). Using paper, text, and images, zines are essentially small paper pamphlets that are easy to copy and share. Turn your message into a zine by collaging different 2D materials and text. Share your zine to spread your message. 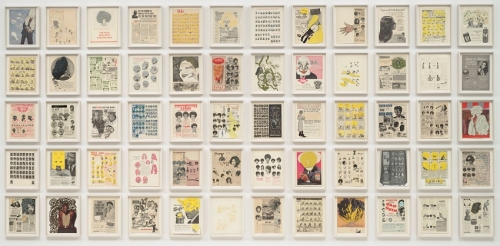 Ellen Gallagher, DeLuxe, 2004-2005. Photogravure, etching, aquatint, and drypoints with lithography, screenprint, embossing, tattoo-machine engraving, laser cutting, and chine collé; and additions of Plasticine, paper collage, enamel, varnish, gouache, pencil, oil, polymer, watercolor, pomade, velvet, glitter, crystals, foil paper, gold leaf, toy eyeballs, and imitation ice cubes, Sixty parts, each: 13 ½ × 10 ½ in. (34.3 × 26.7 cm), Overall: 84 × 176 in. (213.4 × 447 cm). Gift of Barbara Lee, The Barbara Lee Collection of Art by Women. Courtesy Hauser & Wirth and Gagosian. © Ellen Gallagher and Two Palms Press |
 Display it.
Kerry James Marshall’s work shows just how powerful words can be. Create a sign using paper and drawing tools that shows off your message. Will you decorate your sign? Will it be colorful? How will you make your sign stand out? Display your sign in your window to help spread encouragement and hope in your neighborhood! 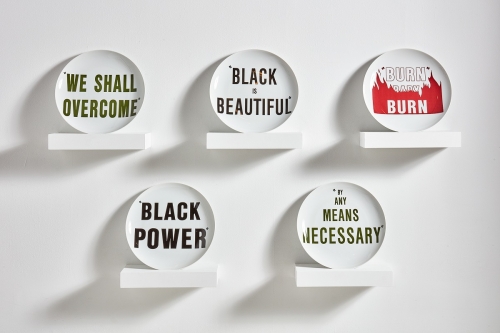 Kerry James Marshall, Untitled, 1998. Ceramic, Five parts, each (diameter): 12 ¼ inches (31.1 cm). Gift of The Dale A. Roberts Collection. Courtesy the artist and David Zwirner, New York/London/Hong Kong. Photo by Charles Mayer Photography. © Kerry James Marshall |
 Write it.
Write a poem that expresses your message. Write from your experiences. Write about the change you want to see in the world. Write about how you will help bring that change. Looking for inspiration? Check out this recent poem by Boston Youth Poet Laureate Alondra Bobadilla inspired by her quarantine experience. Inspiration can be found even while staying at home.
|
 Talk about it.
Find creative ways to think and talk about race with your family and friends through art. We especially like Nina Chanel Abney’s Art Wall installation. Abney often creates large, colorful murals that explore race and identity. Her artwork has been described as “easy to swallow, hard to digest.” Look at her work together. Share what you see. What feels familiar? What stories feel new? What can you learn from this artist and their art? *Whether you’re looking at art, watching TV, or reading a book, make sure that the information you are consuming and sharing is accurate and helps to create a productive conversation.* 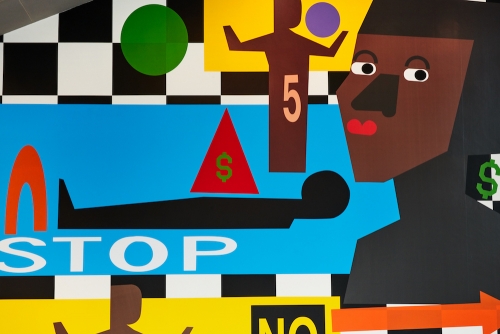 Nina Chanel Abney, installation view (detail), the Institute of Contemporary Art/Boston, 2019. Courtesy of Nina Chanel Abney Studio. Photo by Charles Mayer Photography. © Nina Chanel Abney |
Step 3:
Continue creating for justice! The fight for justice doesn’t stop here. Make and share your art. Talk to your friends and family. There are many ways to support the cause.
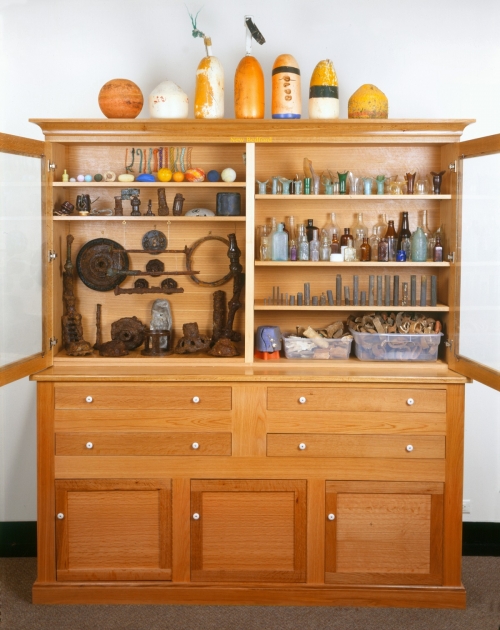
Mark Dion, New Bedford Cabinet, 2001. Wooden and glass cabinet and dig finds, 104 × 74 × 19 inches (264.2 × 188 × 48.3 cm). General Acquisition Fund. Courtesy the artist and Tanya Bonakdar Gallery, New York. © Mark Dion
Art-Inspired Scavanger Hunt
How many things can you find in our scavenger hunt? Inspired by artworks from the ICA’s collection, we invite you to look around your space, out your window, or during a socially-distanced neighborhood walk with your family. Your adventure awaits
A Closer Look
The average museum visitor spends less than twenty seconds looking at any given work of art. For this activity, Tour Programs Manager Amy Briggs Kemeza (and Lucy!) asks you to take a pause and spend some time looking at Sanya Kantarovsky’s Violet — from home! Follow along and answer the prompts in the video, reflect on what you see, and get inspired to make your own work of art.
Family Fun Yoga
Boston-based yoga teacher Marlene Boyette invited participants for a live family-friendly yoga session on Zoom. Stretch your body and your mind with these easy fun poses and meditative flow. Great for children and adults to try out together!
Line Walk Challenge
Staying inside can lead to a lot of pent-up energy — especially for kids! Boston Children’s Museum Health and Wellness Educator Saki Iwamoto is demonstrating the Line Walk Challenge (At Home!) to help you and your kids get some exercise indoors while having fun. Try it at your house!
The Gottabees (from Home!)
Watch this live replay from Boston-based theater group and play experts The Gottabees, as they lead an interactive movement-based activities. Shake it up and get ready to laugh! Great for children and adults to try out together.
Making the Cut
Flolynda Jean, Education Assistant at the ICA and freelance illustrator, shows you one way to bring your stories to life through fun, quirky, and colorful character cut-outs! Follow these simple steps — and as an added bonus — you can turn them into shadow puppets! Do you have a story to tell? Who are the characters? Let your imagination come alive and share them with friends and families!
Collage with Curiosity
Faith Johnson, Arts Program Manager and Gallery Curator at the Boston Children’s Museum, walks us through how to create curiously-collaged works of art. Whether it’s photographs, paper scraps or magazine cut-outs, all you need to do is cut with scissors and stick with glue! Come back to this video any time for simple instructions to start collaging!
Cozy up
Do you have a cozy space in your house where you can go to relax and have some quiet time? In this video, we’ll hear from Saki Iwamoto of Boston Children’s Museum, on how to construct a cozy space (whether you’re a kid or an adult — we can all benefit!), and we’ll even get to see the unique cozy spaces of several kids like you.

Your everyday parenting skills are what your child needs most
“Think of what made you and your child smile today.”
With school closures and summer camps unlikely to happen this year, parents are managing how to best support children’s mental health during this difficult time. Saki Iwamoto offers useful and invaluable insights. Read more
ICA Kids and Family programs are supported, in part, by Vivien and Alan Hassenfeld, the Hassenfeld Family Foundation, the Willow Tree Fund, Alexion Pharmaceuticals, Inc., and Raymond T. & Ann T. Mancini Family Foundation.

This activity is recommended for ages 8+. Please note that the project involves scissors to cut materials. Great for individuals, and virtual collaboration.
Make your own 8-page mini-zine! Essentially miniature magazines, zines often display images and texts and are typically self-published by an individual or small group. Zines are really easy and inexpensive to make and are popularly photocopied to be shared within a community. Investigate artist Ellen Gallagher’s method of altering advertisements and popular cultural texts to create your own visual statement.
You will need:
Steps:
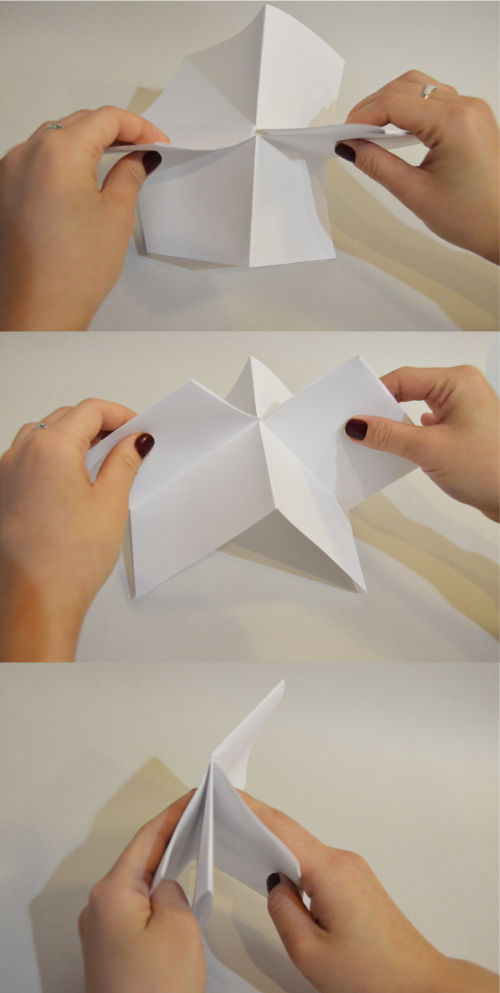
1. Fold your paper in half, then half again, and then half again. When you open your paper, you should have eight equal sections.
2. With the paper completely open, fold it in half with short ends touching. Using scissors, cut halfway across the middle from the fold. When you reopen your paper, there will be a slit in the middle of the sheet.
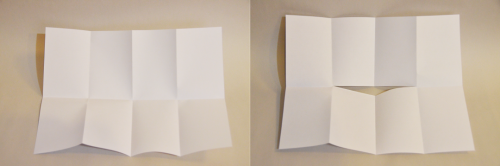
3. Fold the paper lengthwise (long ends touching), hold the paper at either end, and fold the sheet into itself to form an 8-page booklet.
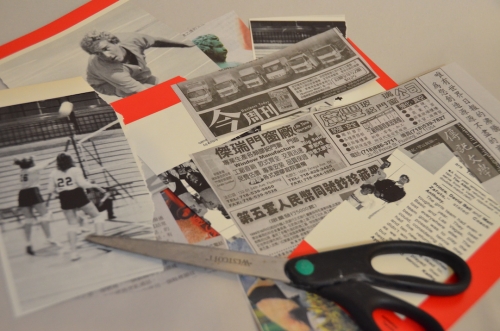
4. Using newspapers, magazines, or other similar materials, explore cutting out images, textures, and text. Subtract from images by cutting away elements. Play with the composition by reassembling pieces on a background; overlap or leave space between cutouts. Glue them into place. Add layers to the collage by drawing and painting over images, adorning with stickers, or writing poetry!
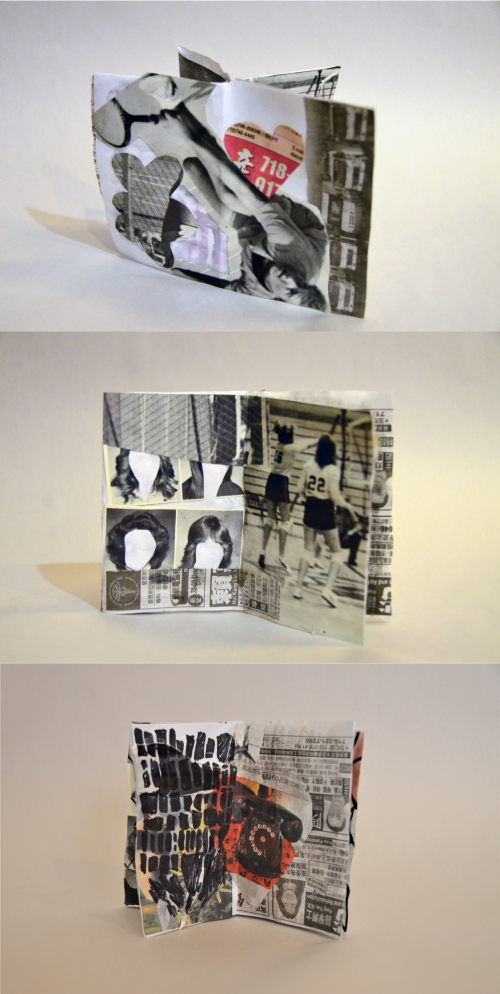
5. Share, collaborate, teach— The mini-zine can be unfolded and photocopied. Zines can be donated to community centers, libraries, and independent bookstores. Zines are notable for being used in community organization and political movements because they can be easily shared. Who will you share your zine with?
This activity was created by Kelly Chen, Visitor Assistant.
Sara VanDerBeek, Continuum Blue, 2008. Chromogenic color print, 30 1/2 × 30 1/2 × 2 inches (77.5 × 77.5 × 5.1 cm). Gift of Dr. Dana Beth Ardi. Courtesy the artist, Metro Pictures, New York, and Altman Siegel, San Francisco. © Sara VanDerBeek
This activity was designed for ages 8 and older but can be adapted for beginners to experts and for younger kids with adult assistance. Please note that this project involves using scissors to cut paper.
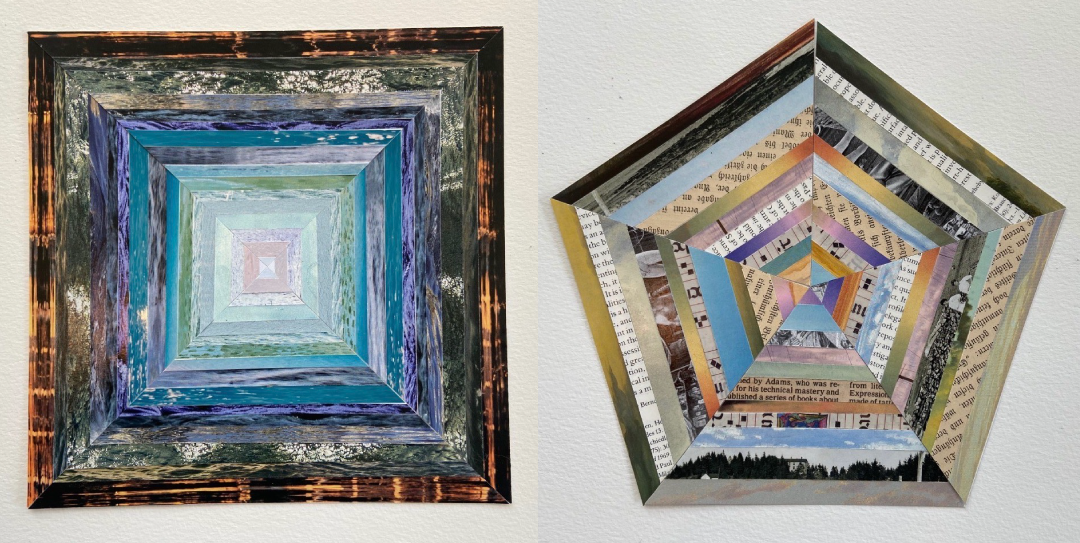
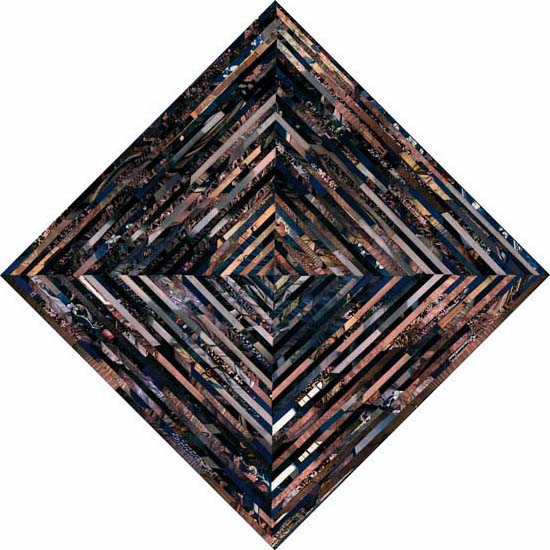
Many artists use everyday materials found around them to create art that conveys different things about the personal and the profound. Sara VanDerBeek’s Continuum Blue is a photograph of a collage, an artwork made by combining different materials (often through cutting and pasting), and shows that it is a great way to create something visually and spatially intriguing. In Continuum Blue, it looks as though you’re looking through a kaleidoscope! We invite you to create your own kaleidoscopic collage and discover how color, texture, pattern, and paper size can create a dazzling effect.
You will need:
Steps:
1. Print and cut out the template of your choosing, cutting out each section into smaller triangle sections. One side of each triangle will have numbers and arrows and the other side will be blank. (The numbers help to keep track of your triangles and the arrows will help you assemble your triangles at the end.)
![Art-Lab_[KCollage]_Step[1]-combined.png](/wp-content/uploads/2023/03/art-labkcollagestep1-combined.png)
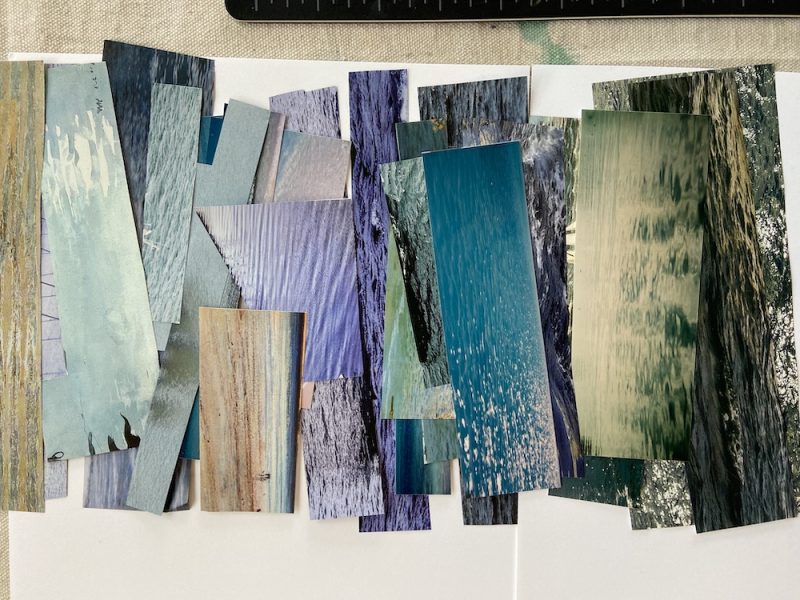
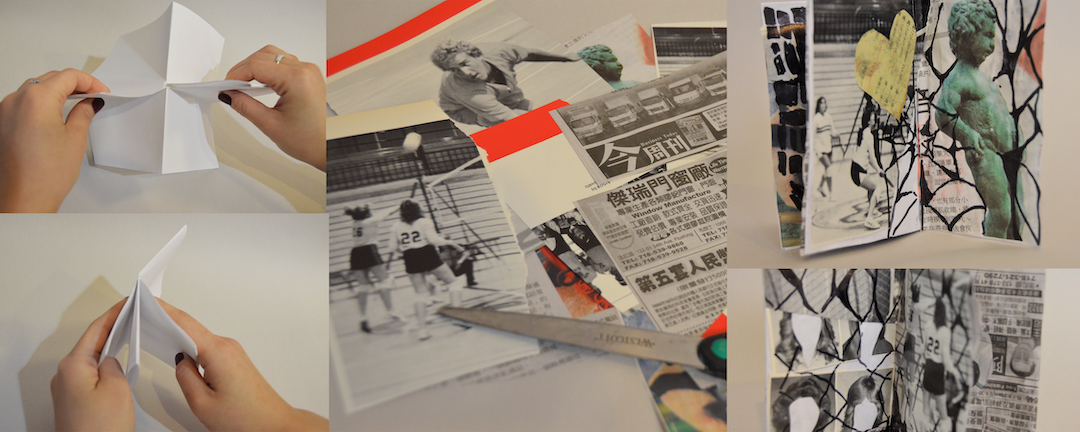
2. Collect your 2D collage materials.
Keep in mind that you will need pieces that are long enough to cover the width of each triangle section. Some examples of things that you can use are newspapers, old photos, magazines, and flyers — Experiment with a range of 2D materials! Perhaps choose a theme for your piece and collect materials based on a color or idea that unites everything.
![Art Lab_[KCollage]_Step[2].jpeg](/wp-content/uploads/2023/03/art-labkcollagestep2-1.jpeg)
3. Cut your collage materials into long strips so that they will fit across the width of your triangle sections. Your strips can be narrow or wide but if you want to make them all equal for a more uniform look, a ruler may be useful.
4. Glue your collage strips onto the blank sides of your triangle sections. (The side with the number and arrow should be on the back.) Glue your first strip along the edge of the longest side of the triangle and work your way to the opposite corner. Don’t worry if the strips hang over the edge (we will trim later). You can create a uniform design by repeating the same pattern of collage strips on each of your triangles, or experiment by creating a new pattern for each.
5. Once you have covered each of your triangle sections with your collage strips, carefully cut along the edge of each triangle to trim off any overhang.
![Art Lab_[KCollage]_Step[4+5].jpeg](/wp-content/uploads/2023/03/art-labkcollagestep45-1.jpeg)
6. Connect your triangles and assemble them with the arrows pointing toward the center. You can either tape them together or glue them onto a background of your choosing.
![Art-Lab_[KCollage]_Step[6]-combined.png](/wp-content/uploads/2023/03/art-labkcollagestep6-combined-1.png)
This activity was developed by Hallie Selinger, Visitor Experience Manager.
Photo by Natasha Moustache
A simple activity for all ages! Color this card and place it in your window to bring hope to your neighborhood.