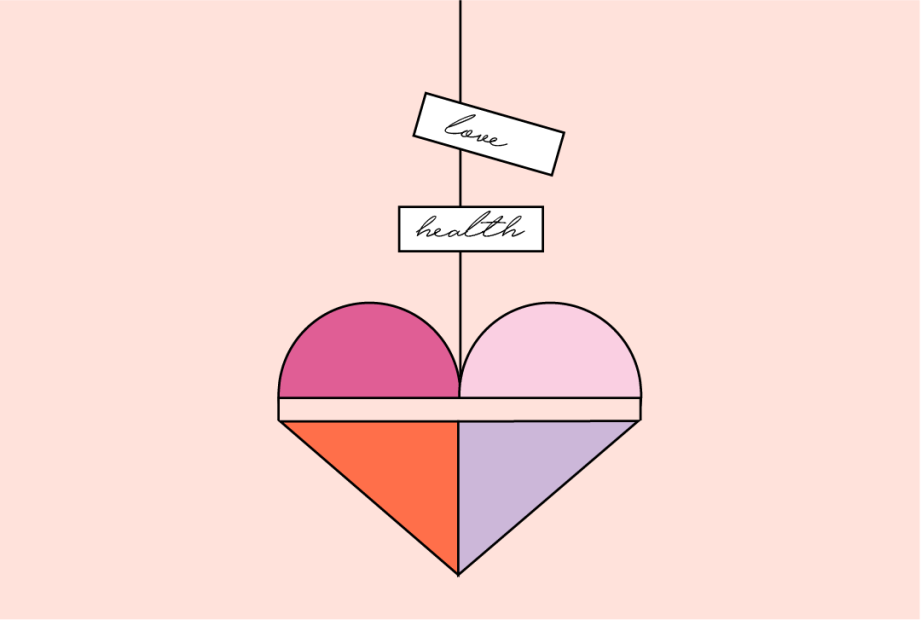
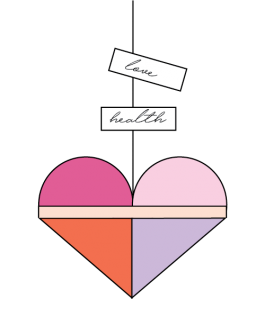
Hanging Pocket Hearts is inspired by Cornelia Parker’s artwork Hanging Fire (Suspected Arson), which represents the vulnerabilities of being human and the challenges of our time. Focus on hope and joy by creating one heart or a collection of hearts. Hang somewhere special to inspire you each day.
This activity is designed for children ages 5 and up and their grownups to work on together at home.
Materials:
Paper
(8.5” x 11” sheet)
Pencil
Ruler
Scissors
String or yarn
Glue or tape
Drawing materials:
crayons, markers, paint, etc.
1.
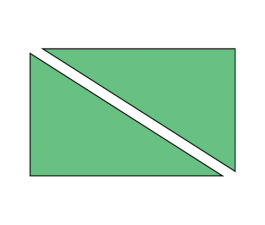
Using a pencil and ruler, measure and cut your paper into a 4″ x 6″ rectangle. Save the rest of the paper for step 4.
2.
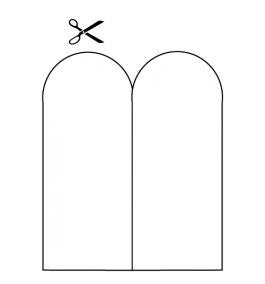
Fold the paper in half, bringing the long edges to meet.
Cut a semicircle at the top as shown.
Reopen the paper and lay it flat on your work surface.
3.
Fold the bottom edge of the paper up to the base of the semicircle. Take the bottom left corner and fold it to the center; do the same with the bottom right corner. Then fold the remaining strip down. Tuck the corners of the strip to the back side of the heart to secure the pocket.
4.
Decorate using drawing materials. On small pieces of paper, write or draw what you are thankful for or the emotions you are feeling. Tuck these into your heart or attach to the string. Glue or tape your heart to your string and hang it somewhere special!
TIPS: To make a precise heart pocket, fold slowly and thoughtfully. Use your fingernails or the edge of a pencil to firmly crease your folds. You can make smaller or larger heart pockets by keeping the same measurement ratio. Try working with a piece of paper that is 2” x 3” or 8” x 12”.
This activity was created by Sergio Salicio-Lupiañez, Visitor Assistant.
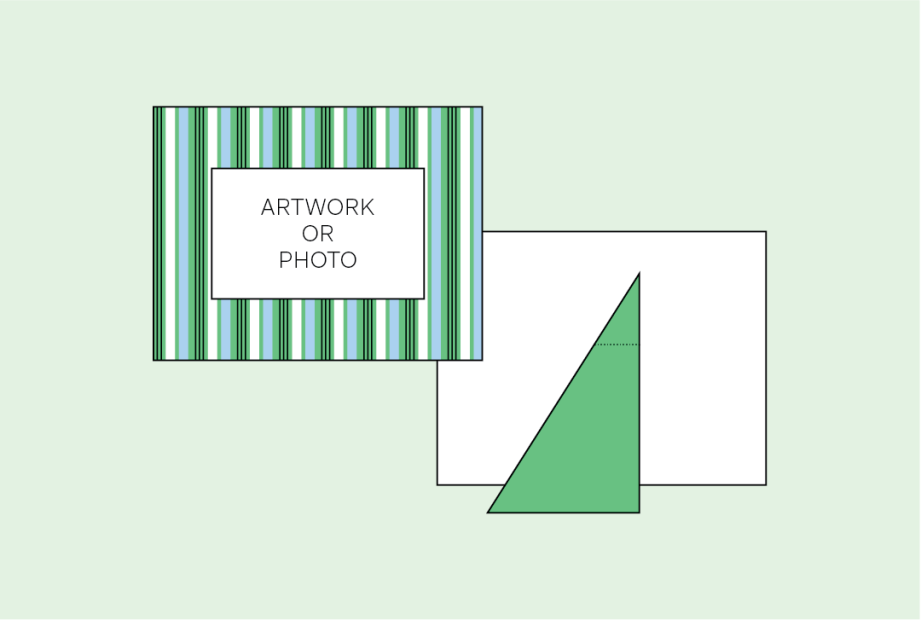
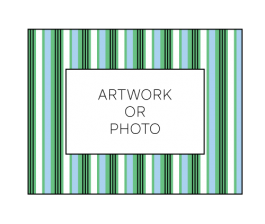
Inspired by the 30+ portraits hanging in i’m yours: Encounters with Art in Our Times, this activity invites you to create your own handmade picture frame with recycled materials. Make a personalized frame for one of your favorite photographs or even your own drawing.
This activity is designed for children ages 5 and up and their grownups to work on together at home. Please note that this project involves using scissors to cut cardboard.
Materials:
Artwork that you would like to frame, like a photograph or drawing
Cardboard
(Read instructions to determine how much cardboard you’ll need)
Pencil
Ruler
Scissors
Glue or tape
Drawing materials:
crayons, markers, paint, etc.
Steps:
1.
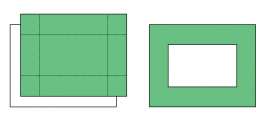
Using a pencil and ruler, measure the artwork that you would like to frame. Next, measure and cut a piece of cardboard that is 3” x 3” larger than the artwork: This will be the front of your frame. Cut a second piece the same size as the first: This will be the back. On the front of your frame, measure and cut out an opening for the artwork that is slightly smaller than the size of your artwork
2.
Cut a stand for your frame: Using a new piece of cardboard, measure and cut a rectangle that is roughly half the size of your frame. Using a pencil and ruler, draw a line from the upper left corner of the rectangle to the bottom right corner. Next, cut on the line. You only need one of the triangles for your frame.
3.
Using drawing materials, decorate the frame. Center your artwork on the back of the frame. Place the front of the frame on top so that your photo appears through the opening. Adjust until artwork is centered, then glue or tape the artwork in place onto the back. Tape will make it easier to change drawings or pictures in the frame.
4.
Use glue or tape to attach the triangular piece of cardboard to the back of the frame. Attach the narrowest part of the triangle to the center of the backing for the frame to stand. Bend the cardboard stand as needed for the best angle for your frame.
This activity was created by Sergio Salicio-Lupiañez, Visitor Assistant.
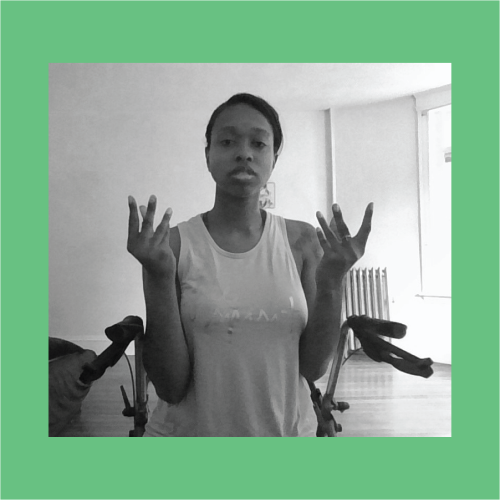
Founder and Director of Abilities Dance Boston Ellice Patterson will take you through gentle stretching for every day. She will also walk you through telling a story through movement that is accessible for all bodies!
La fundadora y directora de Abilities Dance Boston te guiará para hacer un estiramiento suave todos los días. También te introducirá en la narración a través del movimiento que sea accesible para todo tipo de cuerpo.
Materials / Materiales:
Only your body!
¡Solo el cuerpo!
Note from Ellice: Please adapt all of these movements to whatever works for you. I use a mobility aid, so experiment how you can adapt if you use different mobility aids or, if you are a nondisabled person, how you can translate. Have fun and be creative!
Nota de Ellice: Adapta estos movimientos a lo que funcione para ti. Yo uso una ayuda para la movilidad, así que prueba cómo se pueden hacer adaptaciones si se usan diferentes ayudas de movilidad o, si no eres una persona con discapacidad, mira cómo puedes interpretarlo. ¡Diviértete y usa tu creatividad!
Stretch / Estiramientos:
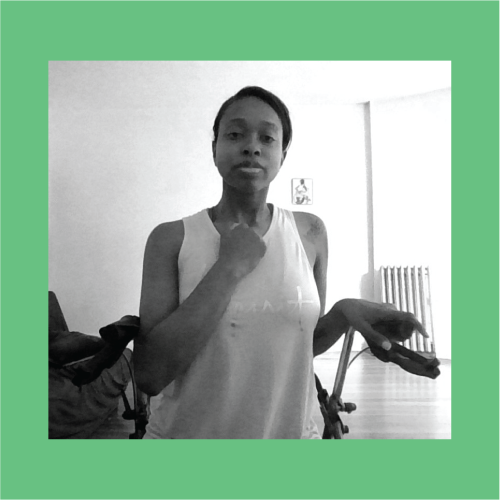
1. Start with making a fist and placing it against your chest. Then take four deep, slow breaths in and out. Use this time to push out all of the negative internal and external thoughts and just focus on being in your body.
1. Para comenzar, coloca el puño contra el pecho. Luego toma cuatro respiraciones, inhalando y exhalando de manera lenta y profunda. Durante este tiempo, libérate de todos los pensamientos negativos internos y externos, y concéntrate solamente en estar con el cuerpo.
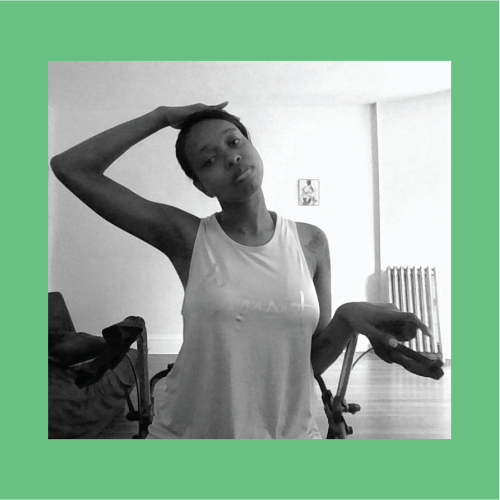
2. Take your hand and gently stretch your head side to side. Then roll your head slowly twice in both directions.
2. Apoya la mano sobre un lado de la cabeza y haz estiramientos de un lado a otro. Luego gira la cabeza lentamente dos veces en ambas direcciones.
3. Take your hands and curl as if you’re wrapping your hand around an ice cream cone finger by finger. Energize through your finger tips and build warmth in your hands.
3. Toma tus manos y haz como si estuvieras envolviendo tus manos alrededor de un cono de helado, dedo por dedo. Siente la energía a través de los dedos y acumula calor en las manos.
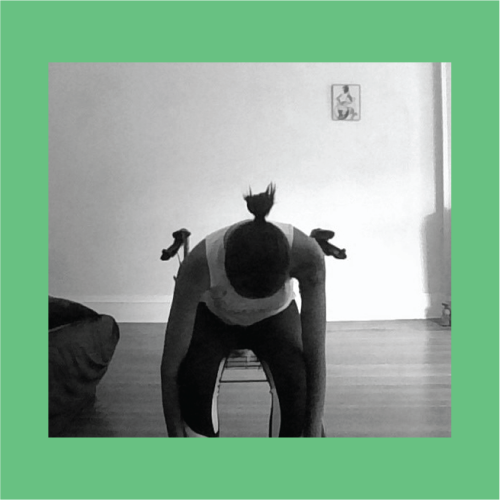
4. Take a stretch, bending forward as far as is comfortable and stay there for 5 sec — onds. If standing, ensure legs are straight and for an extra stretch bend your knees 5 times while bent over. Rise and take a stretch bending backward as far as is comfortable and stay for 5 seconds.
4. Estírate, inclinándote hacia adelante tanto como te resulte cómodo y permanece en esa posición durante 5 segundos. Si estas de pie, asegúrate de tener las piernas extendidas, y si necesitas estirarte un poco más, flexiona las rodillas 5 veces a medida que te inclinas. Levántate e inclínate hacia atrás tanto como te resulte cómodo y permanece en esa posición durante 5 segundos.
Ellice Patterson founded Abilities Dance in 2017 as a space for diverse artists to train and perform. Through their work, they use art as a tool to promote intersectional disability rights. They have performed at the MFA, Peabody Essex Museum, Wimberly Theatre at the BCA, and Gibney Dance in NYC, among other venues.
Ellice Patterson fundó Abilities Dance en 2017 como un espacio de capacitación y actuación para artistas diversos. A través de su trabajo, usan el arte como una herramienta para promover los derechos de diversas clases de discapacidad. Han actuado en el MFA, el Museo Peabody Essex, el Teatro Wimberly en el BCA y Gibney Dance en la ciudad de Nueva York, entre otros lugares.
Find Abilities Dance Boston on social media on Facebook and Instagram.
2020 has been an incredible year, unlike any in our history. This writing exercise and open mic activity calls for individuals to reimagine their present in order to dream toward a brighter and more autonomous future. Let’s get writing and enjoy an open mic for the entire family!
2020 ha sido un año increíble, como ningún otro en la historia. Este ejerci-cio de escritura y actividad a micró-fono abierto invita a volver a imaginar el presente para soñar con un futuro mejor y más autónomo. ¡Comenc-emos a escribir y a disfrutar de un micrófono abierto con toda la familia!
Materials/Materiales:
Writing Utensil / Útiles para escribir
Paper / Papel
Make-shift “microphone” (any household item will do!) / “Micrófono” (¡cualquier artículo del hogar servirá!)
Instructions:
Gather your materials and find a cozy and quiet place to write.
Think of an occurrence of this year you’d like to change or something that you wish had not happened. It can relate to something as large as the pandemic, or a small mishap in your day. Once you have thought of some-thing, go ahead and write it down!
Write the story of that occurrence as it happened. Imagine you’re telling the story to your friend. When you get to the moment you’d like to change, in-sert a “miracle” or a moment of magic that changes the outcome.
Host an open mic (with your makeshift “microphone”) where you and others can share their writing aloud. You can organize this live with the people in your household, or plan a virtual open mic via video call with friends and family. Offer snaps and applause for some of your favorite moments.
Instrucciones:
Reúne los materiales y busca un lugar cálido y tranquilo de tu casa para escribir.
Piensa en un hecho que haya ocurrido este año y que te gustaría cambiar o en algo que desearías que no hubiese suce-dido. Puede estar relacionado con algo tan importante como la pandemia o con un pequeño contratiempo en tu día. Una vez que hayas pensado en algo, ¡comien-za a escribir acerca de eso!
Escribe una historia sobre este hecho tal como sucedió. Imagina que le estás con-tando esta historia a un amigo. Cuando llegues al momento que quisieras cambi-ar, inserta un “milagro” o un momento de magia que cambie el resultado.
Presenta una sesión de micrófono abier-to (con tu “micrófono” casero) para que tú y los demás compartan en voz alta lo que escribieron. Puedes organizarla en vivo, con las personas que viven en tu hogar, o planear una sesión de micrófono abierto virtual con amigos y familiares. Saca fotografías y aplaude algunos de tus momentos favoritos.
Porsha Olayiwola is a writer, performer, educator, and curator who uses afro-futurism and surrealism to examine historical and current issues in the Black, woman, and queer diasporas. Olayiwola is the author of i shimmer sometimes, too and the current Poet Laureate for the City of Boston.
Porsha Olayiwola es una escritora, intérprete, educadora y curadora que examina temas históricos y actuales de las comunidades negras, de mujeres y homosexuales a través del afrofuturismo y el surrealismo. Porsha es la autora de i shimmer sometimes, too (a veces, también yo brillo) y es la Poeta Laureada actu-al de la ciudad de Boston.
The Aztecs used a variety of wind and percussion instruments to make music, including rattles and different kinds of drums. For the Aztecs, dance and songs were ways of praying and meditating to be in harmony with nature, earth, and the universe. In their dances they represented the elements (Wind, Fire, Water, and Soil) and performed to the four cardinal points (North, South, West, and East) to request from Mother Earth the permission to live and work.
The symbol “Nahui Ollin” (pro — nounced as naw-wee-oh-leen) represents the day of the Aztec calendar associated with Xolotl. Xolotl is the god of shifting shapes, twins, and Venus, the Evening Star. Nahui means four, and Ollin means movement.
There are beautiful songs and poetry in Nahuatl, the language of the Aztec people and their descen — dants. Create your own Ayacachtli, or Aztec rattle, and play and sing along to “Huey Tonantiz,” which means Great Mother Earth.
Los aztecas usaban una variedad de instrumentos de viento y de percusión para crear música, como sonajeros y diferentes tipos de tambores. Para los aztecas, la danza y las canciones eran maneras de rezar y meditar para estar en armonía con la naturaleza, la tierra y el univer — so. En sus danzas, representaban los elementos (aire, fuego, agua y tierra) y bailaban en dirección a los cuatro puntos cardinales (Norte, Sur, Este y Oeste) para pedirle per — miso a la Madre Tierra para vivir y trabajar.
El símbolo de “Nahui Ollin” (se pronuncia na-hui-o-lin) representa el día de Xolotl en el calendario azteca. Xolotl es el dios de las formas cambiantes, los mellizos y Venus, la estrella de la tarde. Nahui significa cuatro, y Ollin significa movimiento.
En el idioma de los aztecas y sus descendientes, el nahuatl, existen bellas canciones y poemas. Crea tu propio ayacachtli, o sonajero azteca, para tocar y cantar “Huey Tonantiz,” que significa la Gran Madre Tierra.
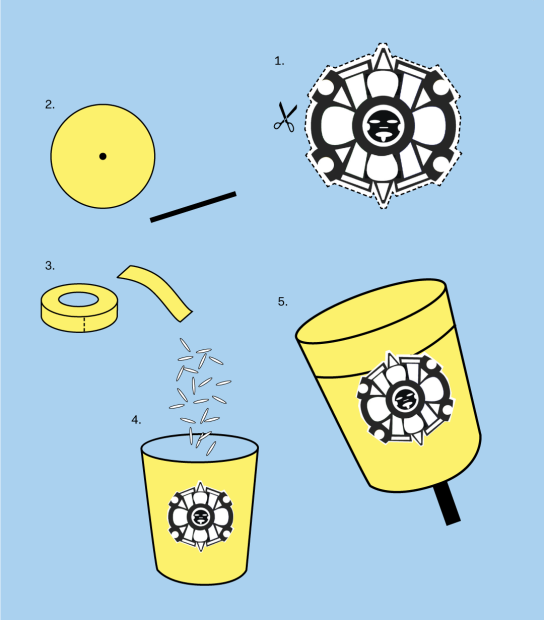
Materials / Materiales:
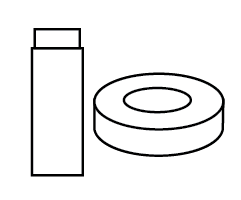
A paper cup or container with a lid / Un vaso de papel o un envase con taparojos
A handful of uncooked rice, dried beans, or other material for filling your Ayacachtli / Un puñado de arroz sin cocinar, frijoles secos u otro material similar para llenar el ayachachtli
Drawing and coloring tools, like crayons or colored pencils / Elementos para dibujar y colorear, como crayones o lápices de colores
Glue / Pegamento
Scissors / Tijeras
One skewer or stick / Una brocheta o un palillo
Colored masking tape / Cinta de enmascarar de color
Instructions / Instrucciones:
1. Decorate your cup. Color and cut out the image of the “Nahui Ollin” symbol. Glue it on to your cup. Add your own drawings and symbols. Be as creative as you like!
2. Very carefully (and with adult supervision), create a small hole in the bottom of the cup and insert the stick into the cup to attach it.
3. Use the masking tape to wrap the stick and secure it to the cup.
4. Fill your cup with rice.
5. Close the cup with the lid and seal it with masking tape.
Note: The sound will be louder with rice. It will sound different if you use beans. You can also try plastic beads or other similar mate — rials. Explore the sounds and beats of nature and try to imitate them with your Ayacachtli.
1. Decora el vaso. Colorea y recorta la ima — gen del símbolo de “Nahui Ollin”. Pégalo al vaso. Agrega tus propios dibujos y símbolos. ¡Sé todo lo creativo que quieras!
2. Con mucho cuidado (y con la supervisión de una persona adulta), crea un pequeño orificio en el vaso e inserta el palillo en él para unirlo.
3. Forra el palillo con la cinta adhesiva y sujétalo al vaso.
4. Llena el vaso con arroz.
5. Cierra el vaso con la tapa y séllalo con cinta adhesiva.
Nota: El sonido será más fuerte si usas arroz. Sonará diferente si empleas frijoles. Tam — bién puedes probar con cuentas de plástico y otros materiales parecidos. Investiga los sonidos y los ritmos de la naturaleza e intenta imitarlos con tu ayacachtli.
IN ENGLISH
“GREAT MOTHER EARTH”
Great Mother Earth
Creator of the living things
You bring joy to my heart and I am
grateful to you.
Translated by Veronica Robles
“HUEY TONANTZIN”
¡Huey Tonantzin, Tonantzin,
Huey Tonantzin!
¡Huey Tonantzin, Tonantzin,
Huey Tonantzin!
Ipalnemohuani Noyolo Paqui
Tlazocamati Tonantzin.
Ipalnemohuani Noyolo Paqui
Tlazocamati Tonantzin.
EN ESPAÑOL
“GRANDIOSA MADRE TIERRA”
Grandiosa Madre Tierra,
Creadora de vida alegras mi corazón.
Gracias grandiosa Madre Tierra.
Traducido por Veronica Robles
This activity was developed by Veronica Robles, a Mariachi singer, musician, and folkloric dancer. Robles has become a cultural icon for Latinos in Boston. She has effectively utilized the power of arts and culture to bring the community together by raising awareness on the importance of diversity. She offers in-person and virtual educational programs for K-12 students in schools and cultural organizations.
Veronica Robles es una cantante, música y bailarina folklórica mariachi que se ha convertido en un referente cultural para los latinos de Boston. Ha recurrido de manera eficaz al poder del arte y la cultura para reunir a la comunidad al crear conciencia sobre la importancia de la diversidad. Ofrece programas presenciales y virtuales para estudiantes de primaria y secundaria en escuelas y organizaciones culturales.
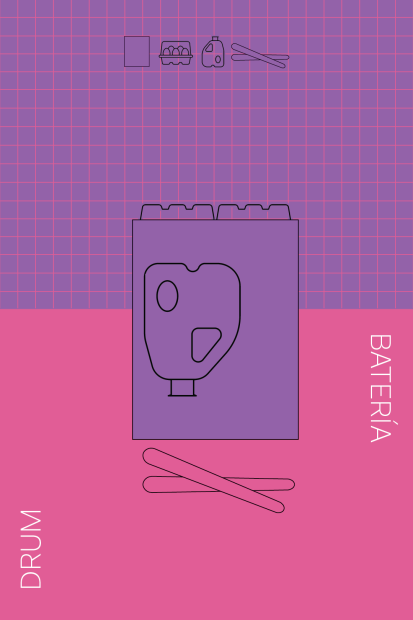
Using different materials for your drum lets you experiment with different sounds— high, low, short, and long—and make different beats and rhythms. Join musician Maria Finkelmeier in using materials found in your kit to make a drum!
See and hear Finkelmeier play with the drum she made in the following video:
Materials:
1 box
1 egg carton
1 ½ gallon milk jug
Tape
Drum sticks
Scissors (optional)
How to make a drum:
1. Place a box on your table surface so the open side is towards the floor.
2. Cut or tear off the lid of the empty egg carton. Leave only the bottom half that holds the individual eggs.
3. Tape the bottom half of the egg carton to the side of the box furthest away from you, parallel to the ground. The bottom of the egg carton should be pointed away from you.
4. Tape the milk jug to the top of the box, aligned with the left edge.
5. Decorate your drum with markers and more!
How to be a drummer:
Grab your drumsticks and explore all of the sounds you can make with your drum. Strike the sides of the box, the top of the box, and the milk carton, and then slide your stick along the egg carton.
Explore making beats! A beat is a repeated pattern and supports the melody of a song.
Listen to your favorite music and jam along. Can you use all of the different sounds of your drum? Is the plastic sound higher than the cardboard? Does the egg carton sound like a Guiro (hollow gourd instrument in South America)?
This activity was developed by Maria Finkelmeier. Named a “one-woman dynamo” by The Boston Globe, Finkelmeier is a percussionist, composer, public artist, educator, and arts entrepreneur. Maria has created large-scale multimedia events in public spaces from Cincinnati to Northern Sweden, with several locations in Boston, including Fenway Park and Harvard’s Arnold Arboretum.
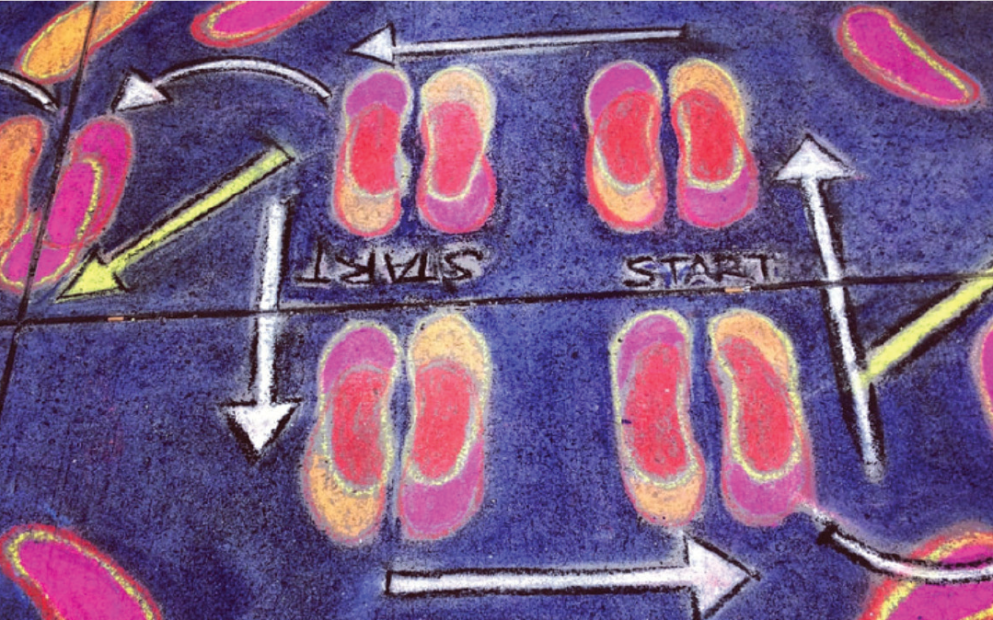
Using dance, chalk, and imagination, create your own Dance Spot on your neighborhood sidewalk!
Dance Spot is a public art project by artist Elisa Hamilton, who creates pop-up dance floors on city sidewalks and invites the public to dance.
Materials:
Sidewalk chalk
Piece of paper and pencil
How to make a Dance Spot:
1. Dance: Choose a song that makes you dance, feel the rhythm in your body, and create dance moves. Notice where your feet move and where your body travels.
2. Map: On a piece of paper, draw a map of your dance. Draw footsteps to show where your feet start, and where they move. Use arrows, squiggly lines, and action words like “Jump” and “Clap” to show the moves of your dance.
3. Chalk: Using chalk, draw a life-size copy of your map on the sidewalk. Trace around your shoes to make footsteps (your new stencil!). Make it big and bold for everyone to see! Now you have your Dance Spot!
4. Dance Spot: Play your song and show your moves! Teach your dance to a friend or neighbor, and invite them to use the Dance Spot, too.
This activity was developed by Elisa H. Hamilton, a socially engaged multimedia artist. Elisa creates inclusive artworks that emphasize shared spaces and the hopeful examination of our everyday places, objects, and experiences.
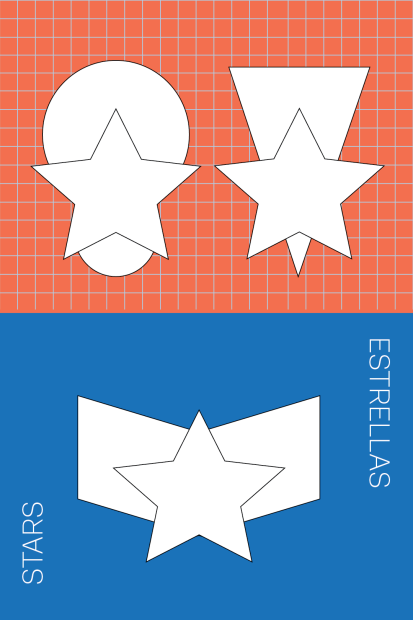
Hope for the future is what keeps us moving forward, but it can take many forms. What does hope look like to you? Fill your stars with hopes to hang in places that need extra light.
Materials:
Star template
Patterned paper
Pipe cleaners (or yarn or string)
Markers
Glue
Scissors
How to make Hopeful Stars:
Think about a hope you want to share. Write or draw things on a star that display your hope.
Cut and glue on patterned paper to fill the empty spaces.
Add another layer to your artwork by drawing on another pattern.
Cut a hole and thread the pipe cleaner through.
Tie the ends of the pipe cleaner together to hang.
This activity was developed by Chanel Thervil, a Haitian American artist and educator. Chanel uses varying combinations of abstraction and portraiture to convene communal dialogue around culture, social issues, and existential questions. At the core of her practice lies a desire to empower and inspire tenderness and healing among communities of color through the arts.
This activity invites you to explore your home and neighborhood in search of personal peace.
To “fill your cup” is to fill yourself with comfort and safety. How do you fill your cup? What objects can you find that represent this sense of security? Explore the different ways you fill your cup today, and help someone fill theirs in return.
1. Use scissors to cut out the city skyline along the dotted line. Include the circle and tabs.
2. Fold tabs and circle at the fold lines.
3. Bring the left and right sides of the city skyline together, creating a cylindrical shape. Dot the tabs with glue and press to close the shape. Fold in the circle to make the bottom of your cup. Dot the tabs with glue to close the bottom of your cup.
4. Explore your home or neighborhood and collect (or draw on paper) the things that make you feel safe, comforted, and peaceful. Fill your cup with these things and place in a special place in your home to visit and reflect on often. Help others fill their cup!
This activity was developed by Mel Taing, an East Boston photographer and filmmaker. As a child of Cambodian refugees in America, Mel is deeply interested in visually exploring concepts of intergenerational trauma, racial identity, spirituality, and resilience in community.
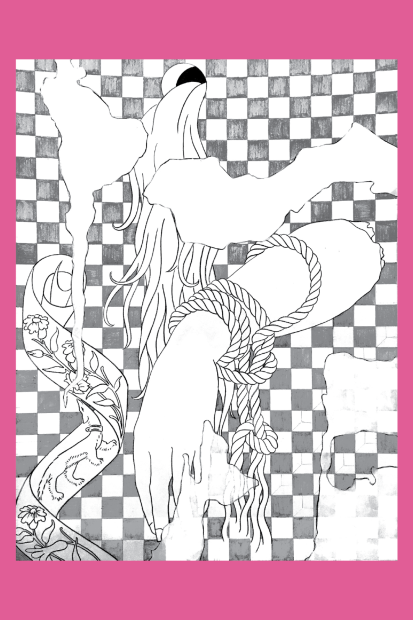
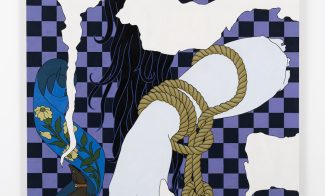
Based on Caitlin Keogh’s painting, Blank Melody, Old Wall, in the ICA’s permanent collection.
You are invited to explore the imagery in this vivid and detailed artwork closely through the act of coloring it in. After completing your new drawing, view Keogh’s finished work here.
Materials:
Coloring page (Included with PDF)
Pencil colors
Pencil sharpener
Painter Caitlin Keogh considers the history of gender and representation, the articulation of personal style, and the construction of artistic identity. With a background in technical illustration and an interest in clothing design, interior decoration, and art history, Keogh’s vivid painterly style combines the graphic lines of hand-drawn commercial illustration with the bold, flat colors of the applied arts—design and decoration of everyday objects.