get tickets

Advance tickets are now available for visits through September 1. Book now

Download PDF

Sometimes in turbulent and unpredictable times, we need role models who can remind us of our ability to overcome di!culties. Superheroes inspire us to become better versions of ourselves and remind us to help take care of each other. This activity encourages you to think about your own potential and how you can help solve issues in your community.

This activity is adaptable for beginners to experts and is great for individuals, groups, and families to work on together at home. 

Materials:

Paper, pencil, pen, and crayon icon.

Drawing supplies, like paper, pencil, colored pencils, markers, and/or crayons

Light bulb icon with light rays.

Your imagination!

Instructions:


1.

Using drawing supplies of your choice, dream up a superhero and design their costume.

Draw them in their costume and in action. Include as many details as you can think of.


2.

Create the story of your superhero. Draw and/or write about their story.
Answer some of these questions throughout your story:

What is their name?

What are their superpowers?

Where is their secret hideout?

What do they do to help their community? 


3.

Share your artwork on social media with #ICAartlab or email us your photos at familyprograms@icaboston.org.

You can also share a photo of someone who is a superhero to you!
Maybe your mom, dad, aunt, brother, friend, neighbor, etc.

There are many anonymous superheroes out there
and we want to give you a space to celebrate them! 


A crayon drawing of a characters in overalls, rainbow-colored hair, and a giant paintbrush.

ACRYLIC WOMAN

SUPERPOWER:
Everything she paints becomes real!

HIDEOUT:
Somewhere near the ICA

Acrylic Woman paints schools, hospitals, and daycare centers for the community. Lately, she has been painting masks, food, and art kits for families!


This activity was created by Sergio Salicio-Lupiañez, Visitor Assistant. 

Download PDF

Download mask template

Are you ready to protect your community? Are you willing to !ght for justice? Show your super skills by making your own superhero mask!

This activity is adaptable for beginners to experts. Younger children may need assistance using scissors to cut cardboard/paper. Great for individuals, groups, and families to work on together at home.

Materials:

Icon of mask.

Mask template or a piece of paper, fabric, or cardboard (a cereal box works great!)

Icon of pencil

Pencil

Icon of scissors

Scissors

Roll of tape icon.

Tape or stapler


Icon of elastic string.

String or elastic band

Icon of beads, feather, and glue stick.

Decoration supplies: markers, paint, sequins, feathers, glue, etc. 


Instructions:

Icon of mask shape with two X's on either side outlined on paper with pencil.

1.
If using the included mask template, move on to step 2. If designing your own mask, work with a buddy at home to measure the width of your face. Have your buddy hold up the piece of paper to your face and use a pencil to carefully make “X” marks on the paper at each of your temples. (Your temples are between your eyes and ears.) Sketch your mask and be sure the design reaches each “X” mark. 


Icon of mask outline with two X's on either side and X's in the eye holes on paper drawn with pencil.

2.
Measure the distance between your eyes to create the eye holes on your mask. Work with an adult to hold up your mask to your face and using a pencil, very gently and carefully, make an “X” mark near each of your eyes. You don’t want the pencil to go through the paper. Put the paper back down on your work surface and draw the design of the eye holes. 
 

Icon of mask outline and scissor cutting the shape.

3.
Using scissors, cut out the shape of the mask. To cut out the eye holes, work with an adult and use a pencil to poke holes through each “X” mark, then round out the eye holes using scissors. Once cut, put down the scissors, then hold up the mask to your face to test if you can see out of the eye holes. Modify if necessary. 
 

Icon of painted yellow and black mask with glue stick.

4.
To give your mask more details and to bring it to life, color and decorate your mask. For extra “air, use tape or glue to attach decorative materials that suit your superhero like sequins, feathers, dried leaves, tin foil, etc.
 

Icon of pink tape roll, yellow and black painted mask, and string.

5.
Attach ear loops. Measure the string or elastic band from your temple around the back of your ear, then cut two pieces at this length. Attach the string/elastic band by either poking a hole through the mask and tying o# the string, or taping or stapling the string ends to the mask. 


This activity was created by Sergio Salicio-Lupiañez, Visitor Assistant.

Share your art with friends and family and on social media with #ICAArtLab or email us at familyprograms@icaboston.org.

Download PDF / Descargar PDF

Let’s do some “gardening” together! What do you want to grow? Use your observation skills, your memories, or your imagination to create your own community garden bed. 

“Cultivemos” una huerta juntos. ¿Qué te gustaría cultivar? Usa tus habilidades de observación, tus recuerdos o la imaginación para crear tu propia huerta comunitaria.

Materials/Materiales:

You can use any materials you like, but here are some suggestions:
Puedes usar cualquier material que quieras, pero aquí tienes algunas sugerencias:

Icon of pencil

Colored pencils
Lápices de colores

Paint brush icon.

Watercolors
Acuarelas

Pen icon.

Markers
Marcadores

Paper icon.

Cut pieces of paper for collage + glue
Recortes de papel para hacer collage + pegamento

Instrustions/Instrucciones: 

Fill the garden bed with whatever you wish to grow! Here are some things to think about:

  1. What are you growing? Flowers? Food? Dreams? Giant robots?
  2. Is your garden bed filled with dirt or something else?
  3. Is anyone in there gardening?
  4. Maybe your garden is filled with a poem or story! 
     

Llena la huerta con todo lo que te gustaría cultivar. Estas son algunas cosas en las que pensar: 

  1. ¿Qué estás cultivando? ¿Flores? ¿Alimentos? ¿Sueños? ¿Robots gigantescos?
  2. ¿Está la huerta llena de tierra o de alguna otra cosa?
  3. ¿Hay alguien allí que esté cultivando?
  4. ¡Tal vez tu huerta contiene un poema o una historia! 


Coloful illustration of a carrot, crayons, a worm, and strawberries.

Colorful illustration of a raven, bee, and pizza.

Colorful illustration of a tomato, bee, snail, grass, and specks of dirt.


Alice Caldwell is an award-winning digital illustrator, multimedia artist, art educator, and big fan of water, both for drinking and swimming. Alice grew up mostly in Europe but now lives in Quincy, Massachusetts. She draws pictures, thinks about sea creatures, and believes art has the power to challenge systems and change lives.

Alice Caldwell es una ilustradora digital premiada, artista multimedia, educadora de arte y gran amante del agua, tanto para beber como para nadar. Alice creció principalmente en Europa, pero ahora vive en Quincy, Massachusetts. Dibuja imágenes, piensa en las criaturas marinas y cree que el arte tiene el poder de desafiar sistemas y cambiar vidas.


Share your artwork on social media with #ICAartlab.
 

Comparte tu obra de arte en las redes sociales con la etiqueta #ICAartlab.

Download PDF

Inspired by the exhibition i’m yours: Encounters with Art in Our Times and artist Firelei Báez’s artwork, build and create a book that tells your unique story! What experiences have shaped who you are today? Dominican-American artist Firelei Báez explores and reimagines the histories of the land she is from. She draws pictures on top of history book pages to tell new ways of reading history, particularly of Caribbean, African, and Latin American cultures. Explore multimedia materials and collaging while creating pages for your story book.

This activity is designed for ages 8 and up, and is easy to adapt for younger ages. ​

Materials:

Icon of paper

Thick paper

Icon of scissors

Scissor

Icon of a glue stick

Glue stick

Icon of overlapping striped triangle, circle, and a flower.

Collage material


Icon of pencil

Drawing utensils

Icon representing cardboard

Optional: Thin cardboard or a cereal box

Steps:


ICAartlab_storyofme_STEP-1.png

1.
Cut and fold an accordion book. Using scissors cut your piece of paper in half length-wise to make two long skinny rectangles. Fold one rectangle in half widthwise. Fold the top flap in half again by bringing the outer edge to meet the center crease. Flip over and repeat with the opposite flap, creating a “W” shape with your paper. Repeat this with your second paper rectangle. Once folded, glue your two paper rectangles together by overlapping outermost flaps, creating one long zig-zag.


ICAartlab_storyofme_STEP-2.png

2.
Read, discuss, and reflect on the “Page Prompts” to get started on designing the pages of your story.
 

Icon of overlapping striped triangle, circle, and a flower.

3.
Unfold your accordion book and respond to the “Page Prompts” using collage materials and drawing utensils. Feel free to use the front and back sides of the paper. Cut, layer, and combine collage materials to tell your story and create a multimedia book. Multimedia means that a variety of materials are combined into a single artwork. 
 

ICAartlab_storyofme_STEP-4.png

4.
Flip through your book from beginning to end and add any finishing touches. Add a title if you would like. Sign your name and today’s date somewhere on your book.
 

ICAartlab_storyofme_STEP-5.png

5.
Share your story with family and friends! Read it out loud. Revisit it whenever you need a reminder of who you are.

 
TIPS!

  • For extra pizazz, create book covers by cutting out thin cardboard (cereal boxes work great!). Using a glue stick, glue each cover onto the outermost pages of the accordion-fold book.
  • Page prompts: Draw a jar full of your favorite things.
  • Draw something that represents the place your family comes from.
  • What is your proudest moment? What did it look like?
  • What is one thing you would do to help someone?
  • Or how has someone helped you? What is something about yourself that you would like others to know?
  • What does your future look like to you?
  • What are other ways you can tell your story with art materials?
     

Share your art with friends and family and on social media with #ICAArtLab or email us at familyprograms@icaboston.org.

Download PDF

Making a collage is a creative and fun way to tell a story. This project will inspire you to turn your ideas, thoughts, emotions, and dreams into images using pictures from old magazines. Get creative and use other materials collected from your home such as fabric or small objects. Let your creativity bloom and have fun!

This activity is designed for children ages 5 and up and their grownups to work on together at home.

Please note that this project involves using scissors to cut paper. 

Materials:

Icon of papers labeled

Zine

Icon of scissors

Scissors

Icon of glue stick and tape

Glue or tape

Icon of overlapping striped triangle, circle, and a flower.

Paper, fabric, and/or found objects


Steps:

ICAartlab_storycollage_STEP1.png

1. COLLAGING

is a process of combining and layering multiple images or pieces of materials together to create a single artwork. What story do you want to tell with your collage? Using scissors, cut out words, images, textures, and colors from old magazines that will tell your story


Art lab icons with striped yellow and pink geometric shapes, a flower, and text reading

2. ARRANGE AND LAYER

the magazine clippings until you find a connection between them and can build a story. Explore different options for a background for your collage. Will it be a solid color, a pattern, or a page of text?


Art lab icons with striped yellow and pink traingles, a flower, and text reading

3. COMPOSITION.

Once you have found an arrangement, or composition, that you like, glue or tape the magazine clippings onto the background of your choosing. 


Share your art with friends and family and on social media with #ICAArtLab or email us at familyprograms@icaboston.org.

Download PDF / Descargar PDF

We all have places where we have been, where we want to be, and where we are right now. A place can cement memories, bring us comfort, and instill hope. In this project, you will create a line drawing with wire of a place from your past, present, or future that represents a moment of you.

NOTE: This activity requires scissors and wire which can be sharp.

Todos tenemos lugares en los que hemos estado, en los que queremos estar y en los que nos encontramos ahora mismo. Un lugar puede consolidar recuerdos, brindar consuelo e infundir esperanza. En este proyecto, crearás un dibujo lineal con alambre de un lugar del pasado, el presente o el futuro que represente un momento de tu vida.

NOTA: Esta actividad requiere el uso de tijeras y alambre que pueden ser afilados.

Materials / Materiales:

  • Photo of a house or building / Fotografía de una casa o un edificio
  • Wire / Alambre
  • Scissors / Tijeras
  • Ruler / Regla
  • Marker or paint / Marcador o pintura


Instructions / Instrucciones:

1. Choose a photo of a house or building that has been a part of your life. Print out or copy the photo in the exact size you want your wire drawing to be. (The wire will scratch the surface of your photo, so don’t use a copy that you want to keep.) You can also draw the house or building on a piece of paper roughly 5” × 7”.

1. Elige una fotografía de una casa o de un edificio que haya sido parte de tu vida. Imprime o fotocopia la fotografía en el mismo tamaño que deseas usar para el dibujo. (El alambre raspará la superficie de la fotografía, así que no uses una copia que quieras conservar.) También puedes dibujar la casa o el edificio en un papel de alrededor de 5” × 7” (13 × 18 cm).


How to create initial frame


Wire outline of double story building next to black and white photo of reference double story building.


2. Outline the building with wire. Leaving an extra inch of wire at the start, begin in the lower right corner and trace around the structure. (You’ll use the extra inch of wire at the start for wrapping after getting all the way around.)

2. Traza el contorno del edificio con alambre. Dejando una pulgada adicional de alambre al inicio, comienza en la esquina inferior derecha y traza el contorno de la estructura. (Usarás la pulgada adicional de alambre del inicio para cerrar después de dar toda la vuelta.)


Demonstration using scissors to add sections of wires


Black and white photograph of a double story building next to a simplified wire rendering of the same building.


3. Outline the interior details. This can be done separately and then added to the whole piece (be sure to leave extra wire at the ends you want to attach) or worked from the same wire used for the building outline.

3. Traza el contorno de los detalles del interior. Esto puedes hacerlo por separado y luego agregarlo a la pieza entera (asegúrate de dejar alambre adicional en los extremos que deseas unir) o con el mismo alambre que has utilizado para el contorno del edificio.


Hands manipulating wire to form a double story house with windows, a door, and a roof.


4. Optional: Make a backing by outlining the building again but add a folded tab of about ¾ of an inch every 1 ½ inches or so. You will then fold these tabs around your first outline from the back to give your wire drawing more structure. 

4. Opcional: Para crear un apoyo, vuelve a trazar el contorno del edificio, pero agrega una pestaña doblada de alrededor de ¾ de pulgada (2 cm) cada 1 ½ pulgadas (4 cm) aproximadamente. Luego, dobla estas pestañas por detrás del primer contorno para darle más estructura al dibujo lineal.


Side-by-side images of a line drawing of a house made from wire, and a sepia photograph of the same house


5. Use a marker or paint that matches the color of your wire to cover up the spots where the plastic coating has scratched off.

5. Con un marcador o con pintura que sea del color del alambre, cubre los lugares donde se haya raspado el revestimiento plástico.


Tips:

  • Check out demonstration videos featuring CW Roelle at icaboston.org/art-lab
  • Plan ahead! This is basically a contour drawing where the line never ends so know where you want the line to go. Occasionally you will have to go back over lines but that is ok!
  • Use a ruler as a hard edge to make clean bends in your wire.
  • Use scissors not only to cut the wire but also like a pair of pliers to grip the wire when wrapping or to fold over tabs. Use the tips only and be careful not to press too hard.
  • When outlining the building or any of the details, lay the wire directly on the image, then put your fingernail down where the next bend should go and hold it tight until you can make the bend right where you need to.
  • Your lines may get bent out of shape as you work, but you can always just straighten them out. 

Consejos:

  • Consulta los videos de demostración de CW Roelle en icaboston.org/art-lab
  • ¡Planifica con antelación! Este es básicamente un dibujo de un contorno en el que la línea no termina nunca, por lo que debes saber adónde quieres que vaya. En ocasiones, tendrás que regresar por las líneas, pero no hay problema.
  • Usa una regla como borde duro para hacer dobleces prolijos en el alambre.
  • Usa las tijeras no solo para cortar el alambre sino también como un alicate para sujetar el alambre cuando lo cierres o lo dobles sobre las pestañas. Usa solamente las puntas y ten cuidado de no apretar demasiado fuerte.
  • Cuando traces el contorno del edificio o de cualquiera de los detalles, apoya el alambre directamente sobre la imagen. A continuación, apoya la uña donde debe ir el doblez siguiente y sostén con fuerza hasta que puedas hacer el doblez exactamente donde lo necesites.
  • Las líneas pueden deformarse a medida que trabajas, pero siempre puedes volver a enderezarlas. 
     

Hands manipulating wire while holding a ruler. Black and white photo of a building lays on the table.

One hand holds wire outlining a double story building while the other cuts a part of it with scissors.


CW Roelle draws three-dimensional line drawings with wire. His images are studies of moods, thoughts, life, place, shape, and line. A graduate of the Maryland Institute College of Art and a MacColl Johnson Fellow, he lives and works in western Rhode Island.

CW Roelle crea dibujos lineales tridimensionales con alambre. Sus imágenes son estudios de estados de ánimo, pensamientos, vidas, lugares, formas y líneas. Graduado en el Maryland Institute College of Art y destinatario de la beca MacColl Johnson, vive y trabaja en el oeste de Rhode Island.


Share your artwork on social media with #ICAartlab

Comparte tu obra de arte en las redes sociales con #ICAartlab


Download PDF

Hanging Pocket Hearts is inspired by Cornelia Parker’s artwork Hanging Fire (Suspected Arson), which represents the vulnerabilities of being human and the challenges of our time. Focus on hope and joy by creating one heart or a collection of hearts. Hang somewhere special to inspire you each day.

This activity is designed for children ages 5 and up and their grownups to work on together at home.​

Materials:

Icon of paper

Paper
(8.5” x 11” sheet)

Icon of pencil

Pencil

Icon of rule

Ruler

Icon of scissors

Scissors


Icon of string

String or yarn

Icon of glue stick and tape

Glue or tape

Icon of crayon and paintbrush

Drawing materials:
crayons, markers, paint, etc.


Art Lab Play Date Hanging Pocker Hearts Step 1. 4x6 blank piece of paper.

1.
Using a pencil and ruler, measure and cut your paper into a 4″ x 6″ rectangle. Save the rest of the paper for step 4.


Art Lab Play Date Hanging Pocker Hearts Step 2. The paper has been folded and a semicircle has been cut from the top of the folded paper to create an

2.
Fold the paper in half, bringing the long edges to meet.
Cut a semicircle at the top as shown.
Reopen the paper and lay it flat on your work surface.
 

Art Lab Play Date Hanging Pocker Hearts Step 3. While unfolded, each bottom corner is folded inwards to align the bottom edge with the middle fold. A folded heart is made

3.
Fold the bottom edge of the paper up to the base of the semicircle. Take the bottom left corner and fold it to the center; do the same with the bottom right corner. Then fold the remaining strip down. Tuck the corners of the strip to the back side of the heart to secure the pocket.
 

Multicolored folded paper heart icon hanging on a string with


4.
Decorate using drawing materials. On small pieces of paper, write or draw what you are thankful for or the emotions you are feeling. Tuck these into your heart or attach to the string. Glue or tape your heart to your string and hang it somewhere special!

TIPS: To make a precise heart pocket, fold slowly and thoughtfully. Use your fingernails or the edge of a pencil to firmly crease your folds. You can make smaller or larger heart pockets by keeping the same measurement ratio. Try working with a piece of paper that is 2” x 3” or 8” x 12”. 

This activity was created by Sergio Salicio-Lupiañez, Visitor Assistant.

Share your art with friends and family and on social media with #ICAArtLab or email us at familyprograms@icaboston.org.

Download PDF

Inspired by the 30+ portraits hanging in i’m yours: Encounters with Art in Our Times, this activity invites you to create your own handmade picture frame with recycled materials. Make a personalized frame for one of your favorite photographs or even your own drawing.

This activity is designed for children ages 5 and up and their grownups to work on together at home. Please note that this project involves using scissors to cut cardboard.

Materials:

Icon of paper

Artwork that you would like to frame, like a photograph or drawing

Icon of rectangle

Cardboard
(Read instructions to determine how much cardboard you’ll need)

Icon of pencil

Pencil

Icon of rule

Ruler


Icon of scissors

Scissors 

Icon of glue stick and tape

Glue or tape

Icon of crayon and paintbrush

Drawing materials:
crayons, markers, paint, etc.


Icons of a green frame and a green sheet with dotted lines overlapping a white sheet.


Steps:

1.
Using a pencil and ruler, measure the artwork that you would like to frame. Next, measure and cut a piece of cardboard that is 3” x 3” larger than the artwork: This will be the front of your frame. Cut a second piece the same size as the first: This will be the back. On the front of your frame, measure and cut out an opening for the artwork that is slightly smaller than the size of your artwork


Icon of two green triangles that almost meet to form a rectangle.

2.
Cut a stand for your frame: Using a new piece of cardboard, measure and cut a rectangle that is roughly half the size of your frame. Using a pencil and ruler, draw a line from the upper left corner of the rectangle to the bottom right corner. Next, cut on the line. You only need one of the triangles for your frame.


Text reading

3.
Using drawing materials, decorate the frame. Center your artwork on the back of the frame. Place the front of the frame on top so that your photo appears through the opening. Adjust until artwork is centered, then glue or tape the artwork in place onto the back. Tape will make it easier to change drawings or pictures in the frame. 


Green triangle overlapping a white square.

4.
Use glue or tape to attach the triangular piece of cardboard to the back of the frame. Attach the narrowest part of the triangle to the center of the backing for the frame to stand. Bend the cardboard stand as needed for the best angle for your frame.

 
This activity was created by Sergio Salicio-Lupiañez, Visitor Assistant.

Share your art with friends and family and on social media with #ICAArtLab or email us at familyprograms@icaboston.org.

Download PDF / Descargar PDF

Founder and Director of Abilities Dance Boston Ellice Patterson will take you through gentle stretching for every day. She will also walk you through telling a story through movement that is accessible for all bodies!
 

La fundadora y directora de Abilities Dance Boston te guiará para hacer un estiramiento suave todos los días. También te introducirá en la narración a través del movimiento que sea accesible para todo tipo de cuerpo. 


Materials / Materiales:

A graphic of a human body figure

Only your body!
¡Solo el cuerpo! 

Note from Ellice: Please adapt all of these movements to whatever works for you. I use a mobility aid, so experiment how you can adapt if you use different mobility aids or, if you are a nondisabled person, how you can translate. Have fun and be creative!
 

Nota de Ellice: Adapta estos movimientos a lo que funcione para ti. Yo uso una ayuda para la movilidad, así que prueba cómo se pueden hacer adaptaciones si se usan diferentes ayudas de movilidad o, si no eres una persona con discapacidad, mira cómo puedes interpretarlo. ¡Diviértete y usa tu creatividad!

Stretch / Estiramientos: 

A black and white image on a green background of a woman pointing to her throat with her right arm and her left leg resting on the arm of the chair.

1. Start with making a fist and placing it against your chest. Then take four deep, slow breaths in and out. Use this time to push out all of the negative internal and external thoughts and just focus on being in your body. 

1. Para comenzar, coloca el puño contra el pecho. Luego toma cuatro respiraciones, inhalando y exhalando de manera lenta y profunda. Durante este tiempo, libérate de todos los pensamientos negativos internos y externos, y concéntrate solamente en estar con el cuerpo.


A black and white image on a green background of a woman placing her right hand on her head and stretching her neck by tilting her head.


2. Take your hand and gently stretch your head side to side. Then roll your head slowly twice in both directions. 

2. Apoya la mano sobre un lado de la cabeza y haz estiramientos de un lado a otro. Luego gira la cabeza lentamente dos veces en ambas direcciones. 


A black and white image on a green background of a woman with her hands and fingers up as she talks.

3. Take your hands and curl as if you’re wrapping your hand around an ice cream cone finger by finger. Energize through your finger tips and build warmth in your hands. 

3. Toma tus manos y haz como si estuvieras envolviendo tus manos alrededor de un cono de helado, dedo por dedo. Siente la energía a través de los dedos y acumula calor en las manos.


A black and white image on a green background of a woman sitting in a chair as she reaches to bend down to her toes.

4. Take a stretch, bending forward as far as is comfortable and stay there for 5 sec — onds. If standing, ensure legs are straight and for an extra stretch bend your knees 5 times while bent over. Rise and take a stretch bending backward as far as is comfortable and stay for 5 seconds. 

4. Estírate, inclinándote hacia adelante tanto como te resulte cómodo y permanece en esa posición durante 5 segundos. Si estas de pie, asegúrate de tener las piernas extendidas, y si necesitas estirarte un poco más, flexiona las rodillas 5 veces a medida que te inclinas. Levántate e inclínate hacia atrás tanto como te resulte cómodo y permanece en esa posición durante 5 segundos. 


Ellice Patterson founded Abilities Dance in 2017 as a space for diverse artists to train and perform. Through their work, they use art as a tool to promote intersectional disability rights. They have performed at the MFA, Peabody Essex Museum, Wimberly Theatre at the BCA, and Gibney Dance in NYC, among other venues. 
 

Ellice Patterson fundó Abilities Dance en 2017 como un espacio de capacitación y actuación para artistas diversos. A través de su trabajo, usan el arte como una herramienta para promover los derechos de diversas clases de discapacidad. Han actuado en el MFA, el Museo Peabody Essex, el Teatro Wimberly en el BCA y Gibney Dance en la ciudad de Nueva York, entre otros lugares.


Find Abilities Dance Boston on social media on Facebook and Instagram.

Find where they will be next at abilitiesdanceboston.org
 

Descubre a Abilities Dance Boston en las redes sociales, en Facebook e Instagram.

Obtén información sobre dónde actuarán próximamente en abilitiesdanceboston.org

Download PDF / Descargar PDF

2020 has been an incredible year, unlike any in our history. This writing exercise and open mic activity calls for individuals to reimagine their present in order to dream toward a brighter and more autonomous future. Let’s get writing and enjoy an open mic for the entire family!

2020 ha sido un año increíble, como ningún otro en la historia. Este ejerci-cio de escritura y actividad a micró-fono abierto invita a volver a imaginar el presente para soñar con un futuro mejor y más autónomo. ¡Comenc-emos a escribir y a disfrutar de un micrófono abierto con toda la familia!

Materials/Materiales:

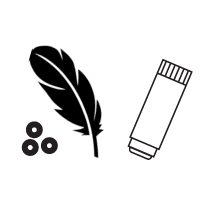
  • Writing Utensil / Útiles para escribir
  • Paper / Papel
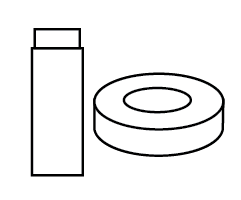
  • Make-shift “microphone” (any household item will do!) / “Micrófono” (¡cualquier artículo del hogar servirá!)
     

A graphic illustration depicting steps for a writing exercise and includes icons of paper, pencil, avatar, and makeshift


Instructions:

  1. Gather your materials and find a cozy and quiet place to write.

  2. Think of an occurrence of this year you’d like to change or something that you wish had not happened. It can relate to something as large as the pandemic, or a small mishap in your day. Once you have thought of some-thing, go ahead and write it down!

  3. Write the story of that occurrence as it happened. Imagine you’re telling the story to your friend. When you get to the moment you’d like to change, in-sert a “miracle” or a moment of magic that changes the outcome.

  4. Host an open mic (with your makeshift “microphone”) where you and others can share their writing aloud. You can organize this live with the people in your household, or plan a virtual open mic via video call with friends and family. Offer snaps and applause for some of your favorite moments.

Instrucciones:

  1. Reúne los materiales y busca un lugar cálido y tranquilo de tu casa para escribir.
  2. Piensa en un hecho que haya ocurrido este año y que te gustaría cambiar o en algo que desearías que no hubiese suce-dido. Puede estar relacionado con algo tan importante como la pandemia o con un pequeño contratiempo en tu día. Una vez que hayas pensado en algo, ¡comien-za a escribir acerca de eso!
  3. Escribe una historia sobre este hecho tal como sucedió. Imagina que le estás con-tando esta historia a un amigo. Cuando llegues al momento que quisieras cambi-ar, inserta un “milagro” o un momento de magia que cambie el resultado.
  4. Presenta una sesión de micrófono abier-to (con tu “micrófono” casero) para que tú y los demás compartan en voz alta lo que escribieron. Puedes organizarla en vivo, con las personas que viven en tu hogar, o planear una sesión de micrófono abierto virtual con amigos y familiares. Saca fotografías y aplaude algunos de tus momentos favoritos.


Porsha Olayiwola is a writer, performer, educator, and curator who uses afro-futurism and surrealism to examine historical and current issues in the Black, woman, and queer diasporas. Olayiwola is the author of i shimmer sometimes, too and the current Poet Laureate for the City of Boston.

Porsha Olayiwola es una escritora, intérprete, educadora y curadora que examina temas históricos y actuales de las comunidades negras, de mujeres y homosexuales a través del afrofuturismo y el surrealismo. Porsha es la autora de i shimmer sometimes, too (a veces, también yo brillo) y es la Poeta Laureada actu-al de la ciudad de Boston.